RAW Footage Transformed to 3D LUTs with DaVinci Resolve: Part 2
In Part 1 of this series I dove into the understanding of why I work with LUTs and the power of how a LUT can mold and shape your image. We went through how I created a LOOK for a film with my emulsion, now we are going to dive into the the emulsion of the Digital Age using RAW footage. Creating a solid foundation for yourself will be the key to your success in delivering your LOOK of your next project.
A few things to consider when working with RAW footage:
A very few key areas to know before you dive into working with Resolve to create your LUT is understanding your camera and how the color profile will react within DaVinci Resolve.
1. Think Like a Colorist, Perform like an Artist
If you are in a RAW workflow, you’re going to have more control when you’re in Resolve. You need to think like a colorist on how every simple movement will result in the change in details. It sounds simple, but you want to make sure you’re covering yourself so that you don’t accidentally over or under expose an image, especially if it wasn’t your intention. Keep your creativity open, just like I do now and have done in the past, I don’t let my mind get caught up in what my video scopes are telling me or what my false color says, I let those tools get me in the ballpark and I let my creativity take the image where I want it to be. A monitor isn’t going to tell you if the picture is right or wrong, because there isn’t a right or wrong, it’s your creative choice.
2. Understand your Native Codec
What camera are you shooting with? What kind of a file does it create? Does it have its own codec? These are all questions that you will need answers to before you even begin creating a LUT for an image.
If you’re working in a RAW workflow of RED (REDCODE), Arri (ArriRAW), or Blackmagic (Cinema DNG) for example, you’ll obviously have more control over white-balance, exposure and other areas, not just your color control.
If your workflow is of a non-RAW format like Apple ProRes or something like Canon XF, you’re not going to have as much control. You also need to be aware of how the files are going to be imported into Resolve.
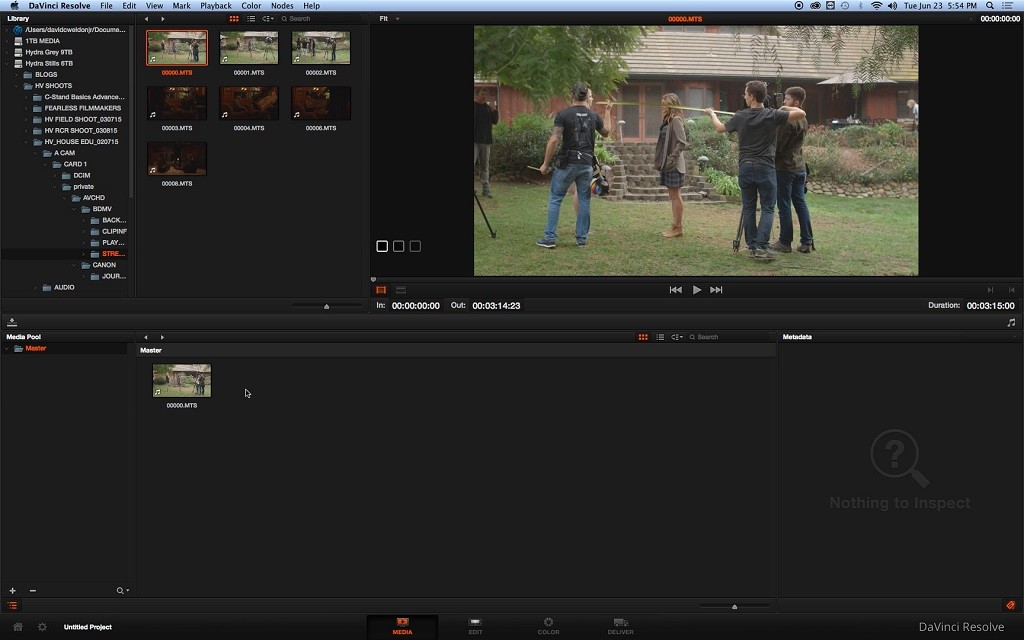
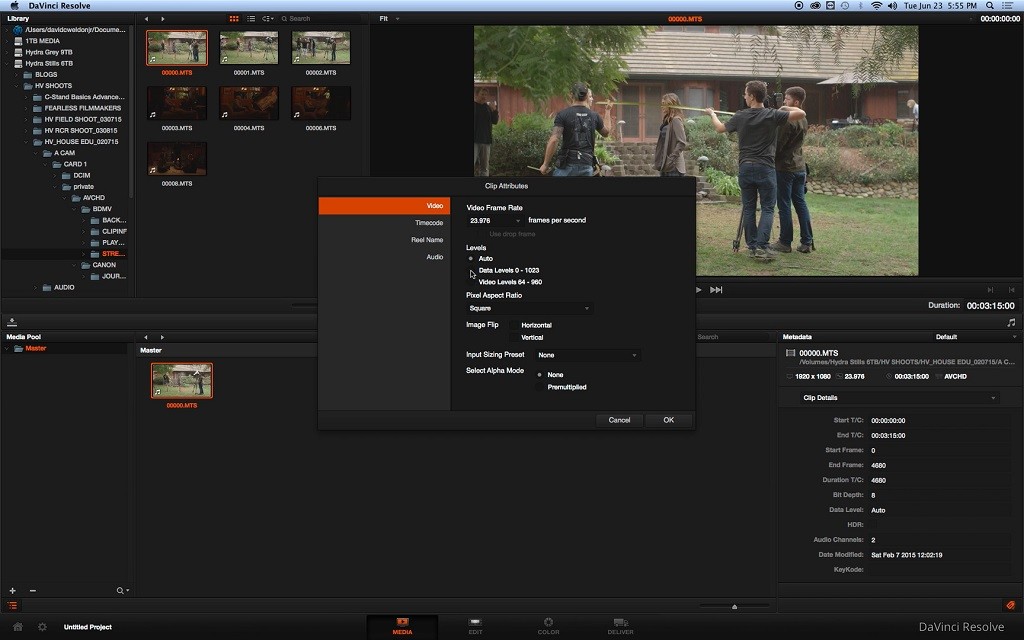
You will see here in our example that we have imported Canon C100 footage from a Shane’s Inner Circle shoot. The Canon C100 shoots in the AVCHD codec, which is a Non-RAW codec. We shot the footage in our custom “SIC 1” Picture Profile for the C100. But let’s say we need to adjust the exposure a bit or the color, as we create a more stylized LUT for our director’s monitor on the shoot day.
The problem is that when you import a non-RAW file, Resolve will determine which areas of the video levels to see automatically. When you select “clip attributes” by right clicking or control-click, you will be able to see the selected video levels.
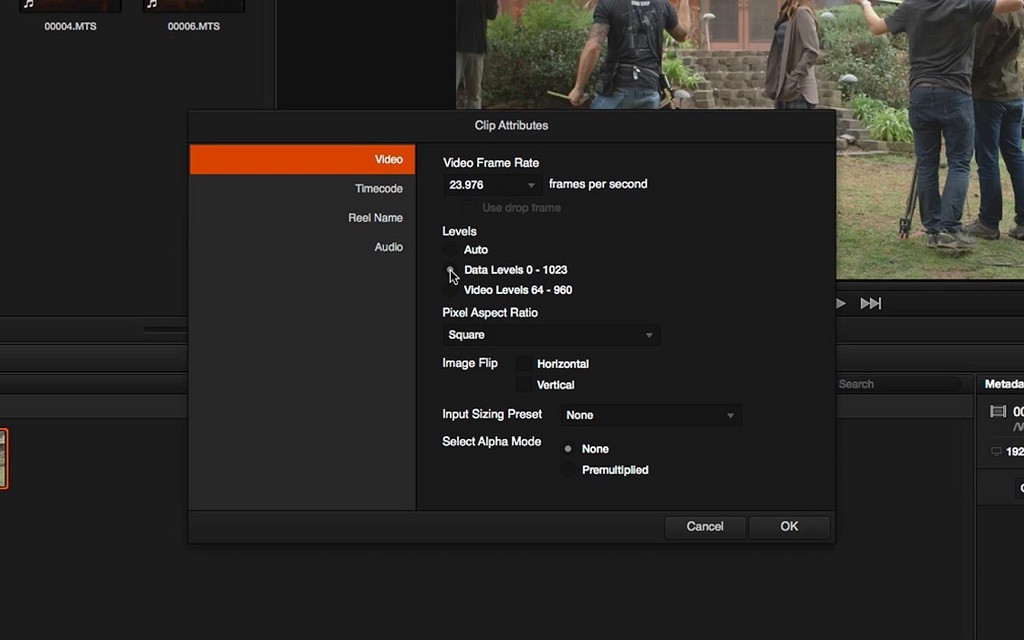
Here you can see that “Auto” is selected. Since we are importing a non-RAW file, Resolve tends to use the “Video 64-960” setting. The 64 is the area of where your black levels will be interpreted and 960 is where your highlights will extend to. With this setting selected, you’re limiting what Resolve will have control over in your black levels and highlights (to understand more on this, learning the areas of your Video Scopes will help).
A brief run-through in understanding your scopes, specifically in relationship to changing the video setting, in your Waveform monitor, you will see a representation of your image through this scale. 0 stands for the lowest point of your black level and 1023 stands for your highest point in your highlights or “clipping” (depending on the camera). This allows you to see where your current image is set, or how you have adjusted it, giving you an idea that isn’t just looking at it “by eye.” We will dive into understanding scopes in a future post on the Hurlblog.
Change this to the Data Level setting of 0-1000. This will give you more control over your LUT creation (and your overall color grade in general).
3. Importing and Setting up RAW Footage
When you are going to import RAW footage into Resolve, it’s best to get your settings straight before you dive in. Don’t worry. I you’ve already gotten past this part and imported everything, there’s still a workflow for that too. That’s coming next.
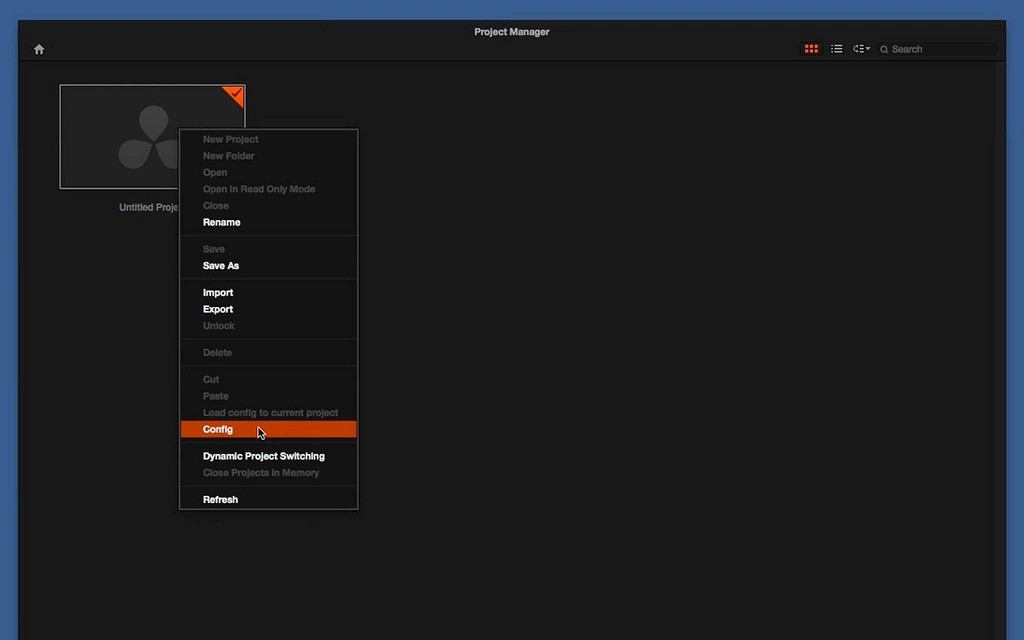
In the Project Manager at startup, right-click or control-click to get to “Config.”
Go to the “Camera RAW” tab and then select which RAW format you’re going to work in.
Here is how we started to create LUTs for the RED Dragon.
Change the Gamma Curve to read “REDlog Film.”
Then change the Color Space to read “Rec709.”
Make sure you select “Apply” in the bottom right hand corner for these changes to take place.
3a. An alternative to adjusting the color space
What if you’ve already gotten past this point on a project and you don’t want to start over? Well, there is a way. Again, understanding what your footage is, you can now figure out how you’re going to get everything adjusted correctly.
● For RED Dragon – REDFilmLog
● For Canon C500 – CanonLog
● For Arri Alexa – C-Log
● For Blackmagic – BMD Film
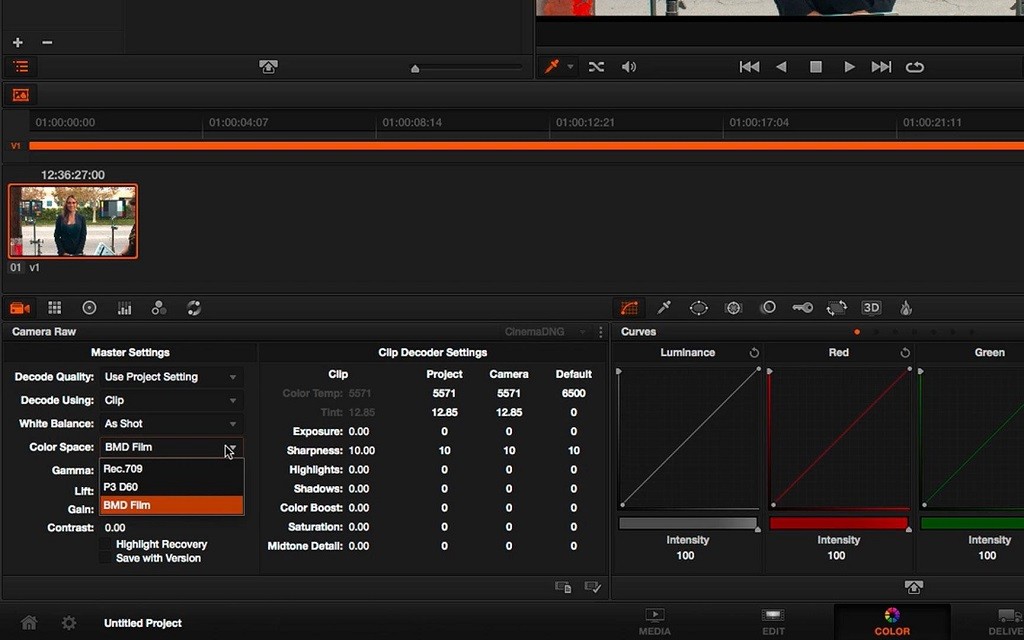
In our example, we are using footage from the Blackmagic URSA 4K Camera. This file is a 4K file recorded in as CinemaDNG.
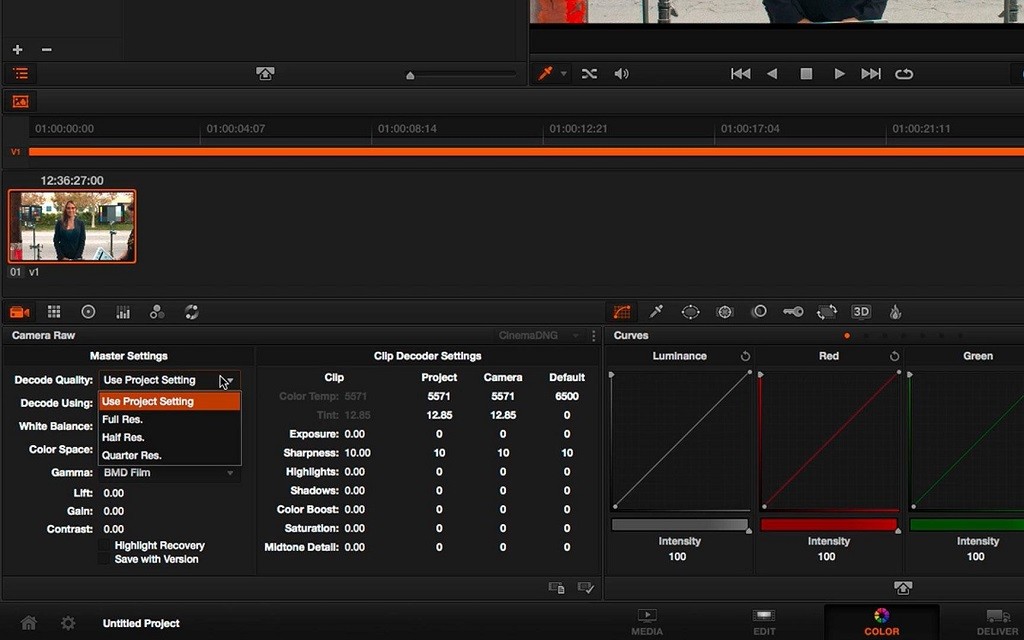
While the clip is selected, make sure you set your “Decode Using” to “Use Project Setting.” This will give you control over the RAW file.
Next, set your Color Space and Gamma to “BMD Film” for Blackmagic in our case. If you are using RED or ARRI footage, refer to our initial setup.
Then go to the clip. Right-click or control click and go to “3D LUT.” Highlight it. Navigate over to “Blackmagic Production Camera 4K to Rec709.”
Now you’ve got the tools to set up your project in DaVinci Resolve. In Part 3 we will dive into exporting this file and getting it ready to send to your Monitor to use on set or in your color bay.
