Media Management for DSLRs with Mike McCarthy (Part 1)
We are so excited to feature guest blogger Mike McCarthy. Whenever I am asked about the post-production workflow and technology, I always consult with Mike about what he feels is the best. Visit Mike’s website to learn detailed post information and workflow at hd4pc.com.
Mike has been at the forefront of designing the Canon 5D workflow since the camera was created. He understands the camera platform inside and out, and how it writes its media and is a genius in the post-production process. Mike takes the time to get out there and do the research by blogging or reading about technical data. He constantly educates himself about the medium and always has a can-do attitude with a smile. It is an honor to have his brain trust on our blog because Mike’s IQ is about 180.
This is Part 1 of Media Management for DSLRs with Mike McCarthy. Be sure to also read Part 2 for the full picture!
Media Management for DSLRs with Mike McCarthy
I am Mike McCarthy, the Director of Technology at Bandito Brothers. I have been working with Bandito Brothers since the company started in 2006, and involved with projects using almost any format imaginable. Below are what I’ve worked on, among a few others.
- Film
- SR
- HDCam
- XD
- EX
- P2
- RED
- Si2K
- DSLR
I work with many different hardware and software companies through their beta and development programs. This is important to find the best solutions to the workflow problems presented by new formats and tools. I also document many of the solutions I come across on my own website, and do occasional consulting work for companies that are trying to adapt their existing workflow to new tools and formats.
At Bandito Brothers, we have been working with Shane over the past year to really push the Canon DSLR workflow to the limits. This is in regards to both visual quality and organizational efficiency, factors which are both critical to being able to scale the Canon DSLR video workflow up to larger projects. Hopefully, the things we have learned from this process and present here will benefit others who are certain to find themselves in similar situations.
Canon DSLR Workflow
A large part of my job over the past year has been to develop a solid workflow for handling Canon DSLR footage, from shooting through to final delivery. This workflow has evolved dramatically over the last year as new projects had different needs and new tools have been developed.
While media management is a subject that has been touched on by previous articles on this site, this one is going to focus on certain steps you can take to process and sort your media as you shoot, which can greatly simplify your post process. We have developed this workflow while supporting many different Canon DSLR shoots, from commercials to feature films to documentaries. Most of these tips can be applied to any project and will improve your editing experience regardless of whether you are cutting in Avid, Final Cut, or Premiere.
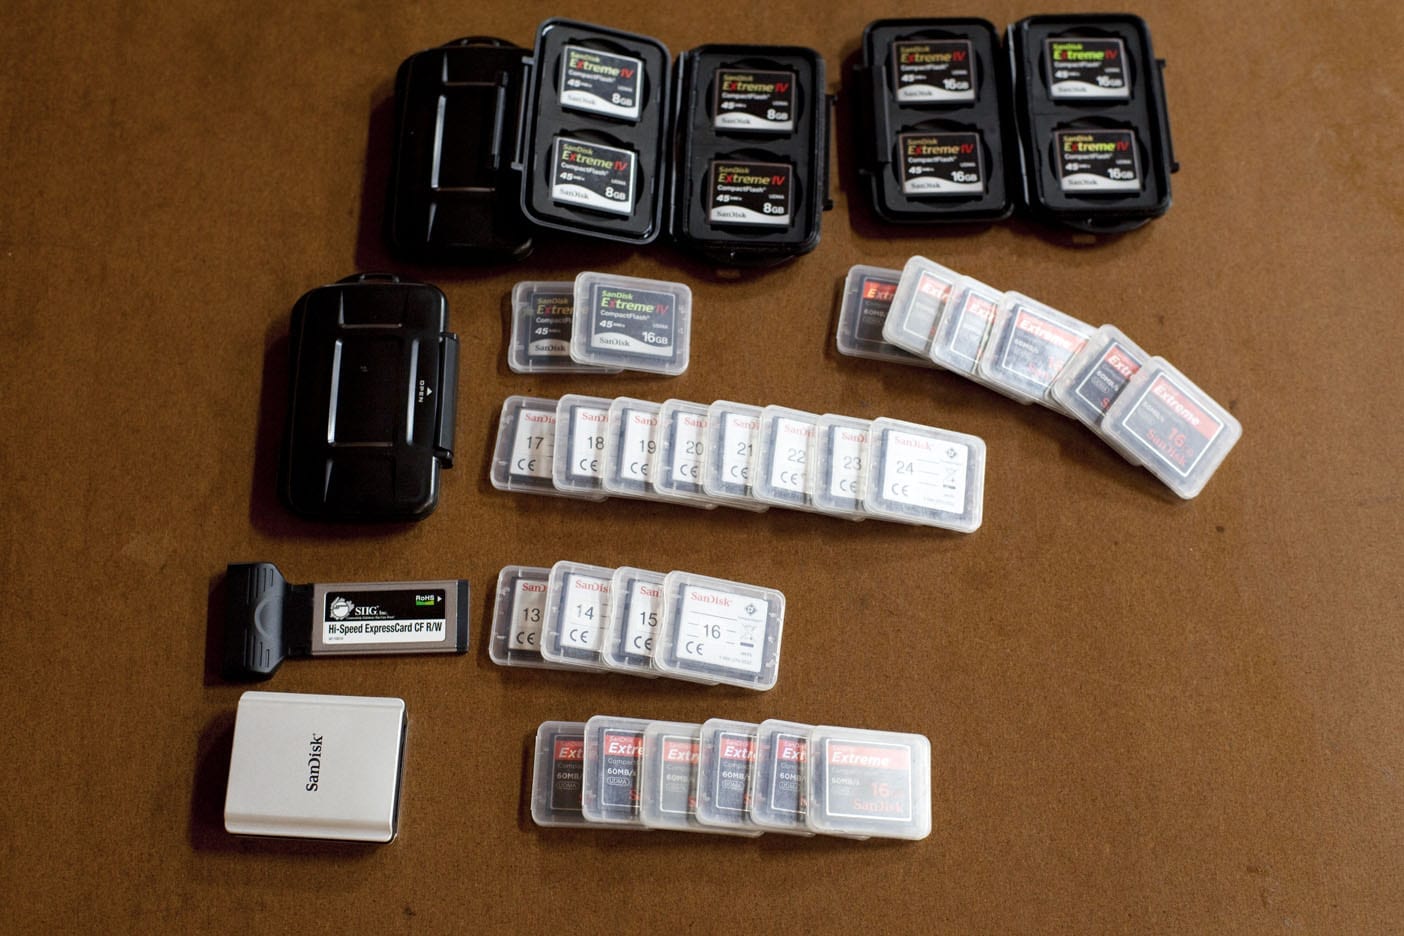
CF Cards (Click for larger images)
Backing up your Footage
The first step in that process is to make multiple backups of every card before it gets wiped and re-used. Due to the possibility of drive failure, I make sure that every clip is backed up on at least two drives before releasing the card to use again. Usually, this will be a copy from my Express Card CF Reader onto my laptop HD, and onto an external drive. If I have power available, this will be an eSATA drive for best performance, but frequently it is a bus-powered USB drive sitting on the palm rest as I work in the seat of my car, or where ever else we happen to be shooting.
Once the footage is on two separate drives, I rename the folder on the card. This causes the camera to acknowledge that there is data on the card but shows nothing in the playback window. That way the camera assistants know that the footage is backed up, and also that they need to format the card before they begin using it again.
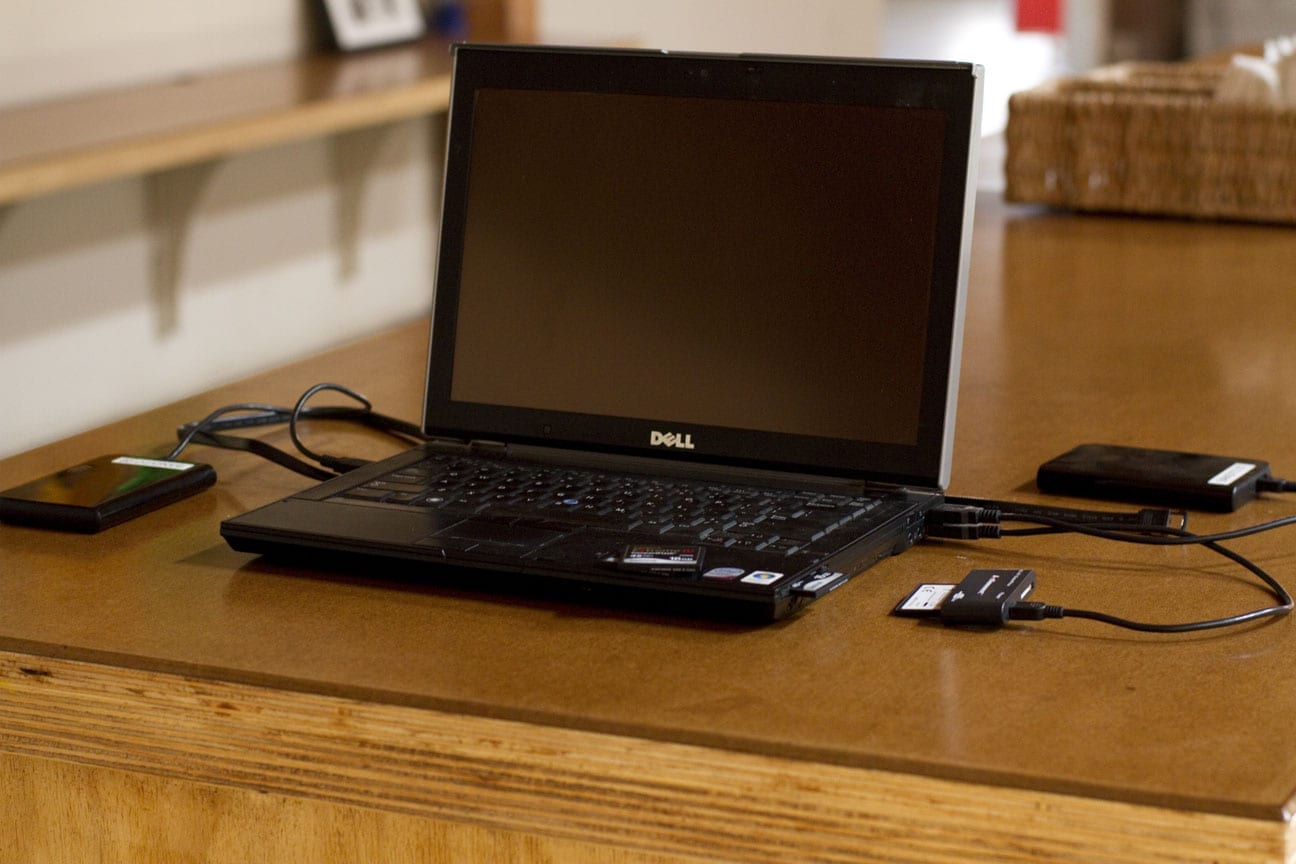
Laptop1 with Drives (Click for larger images)
As long as the footage is duplicated on two drives, I feel safe, until the end of the day, when I make up four copies at night and send them to different places. Once I have the footage safely on a Raid5 array in the office, I wipe all but one of the backup drives and return them to the field. The copy on the Raid becomes my master copy, which I use for all the remaining steps detailed below.
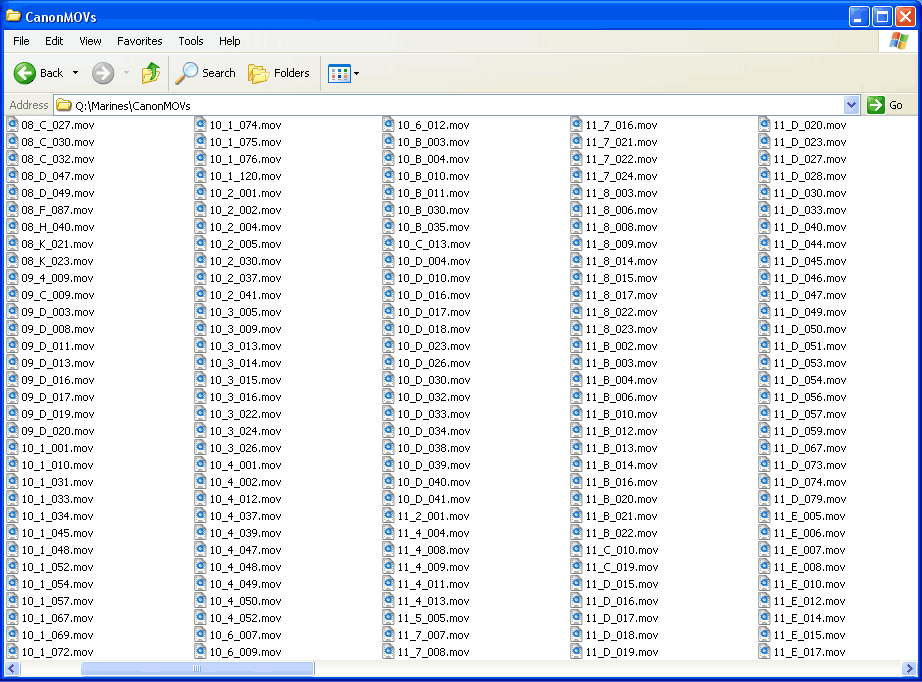
MOV Files (Click for larger images)
Sorting your Footage
Good media management is clearly important for any tapeless workflow, especially with DSLRs. And that goes far beyond just making backups. Naming conventions play a large role in keeping organized. Since having all of your footage named MVI_####.MOV is not ideal, especially if you are shooting with multiple cameras. Eventually, you are likely to have overlapping numbering, leading to duplicate filenames. I deal with this by sorting all footage by camera as it is shot and backed up.
This is a much simpler process if all of the cameras are shooting in totally different ranges of numbers. The cameras can be forced to start numbering the files where ever you want. Once you have the footage sorted and logged, it is a good idea to rename each file. You can do so by using a convention that makes it easier to sort through and organize them. I have a very specific breakdown of how I would recommend doing that posted on my site.
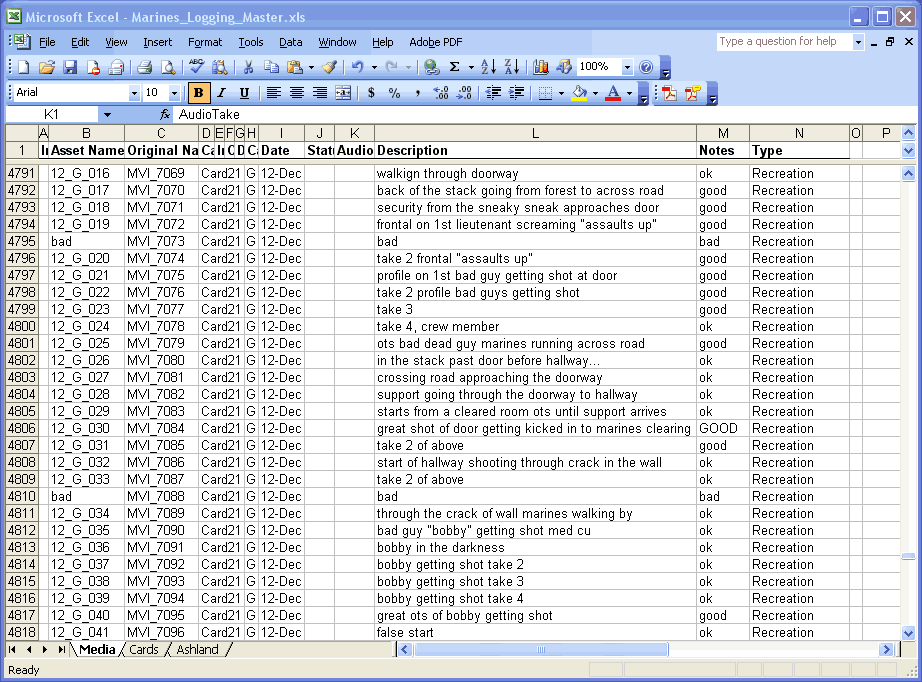
Footage Log in Excel (Click for larger images)
Logging your Footage
Keeping a log of your footage and file names is important. Not just for sorting through the content, but because it allows you to retrace your steps if necessary. It can also assist in automating certain steps in the workflow. For example, the file renaming process. Once you have a folder full of properly sorted and renamed MOV files, (and a few backup copies) you are ready to begin the real post work. I will give an overview of the post-production options and recommended workflows in another post coming shortly.
Schedule 1-on-1 Video Call with Shane Hurlbut, ASC
Looking for mentorship in the film industry? Schedule a 1-on-1 meeting with Shane Hurlbut, ASC today! This is where you can get expert advice from an industry professional on your career or a particular project.
About Filmmakers Academy Cinematographer Mentor Shane Hurlbut, ASC
Director of photography Shane Hurlbut, ASC works at the forefront of cinema. He’s a storyteller, innovator, and discerning collaborator, who brings more than three decades of experience to his art. He is a member of the American Society of Cinematographers, the International Cinematographers Guild/Local 600, and The Academy of Motion Picture Arts and Sciences.
Hurlbut frequently joins forces with great directors: McG’s Netflix Rim of the World and The Babysitter, plus Warner Bros. We Are Marshall and Terminator: Salvation; Scott Waugh’s Need for Speed and Act of Valor; and Gabriele Muccino’s There Is No Place Like Home and Fathers and Daughters. His additional film credits include Semi-Pro; The Greatest Game Ever Played; Into the Blue; Mr 3000; Drumline; 11:14, which earned Hurlbut a DVDX nomination; and The Skulls. Notably, his television credits include the first season of AMC’s Into the Badlands.





Awesome guest blog connection Shane, Mike McCarthy is a serious digitial workflow guru.
I’m noticing PCs in these screenshots and photos, hoping that partII includes some info about a PC workflow; the DSLR world seems to be caught up in the prores/Final Cut world at the moment (especially with plugins like pluraleyes only available on the Mac) but I think that there are a lot of PC users quietly working away with Cineform and Aftereffects and really making that work. That’s my workflow. Card -> Backup -> Neoscene -> Premiere -> Aftereffects.
Eric Ferguson, you are very welcome, Mike knows his stuff. You will totally enjoy the next part of Mike’s blog. It is all about PC rules, Mac and Pro Res are dead. I have done the whole film on a PC based editing and conforming workflow, and I have to say that I am far more impressed with their decompression then Apples. More to come. Thank you so much for your support.
hello, sir.
A very big fan of your work! really love your workflow and post blogs. I wanted to ask a question, What type of sound recording equipment did you guys use on set ?
Thanks.
“It is all about PC rules, Mac and Pro Res are dead.” Oh man, are you serious? I was just about to order an Imac I7 quad core for video. I thought final cut was the way to go. Okay, please tell me the specs of your PC and the editing software used so I can research this out some more. Thanks as always, Shane.
Also, I see your participating in the Zacuto Film vs DSLR shootout. It’s obvious that you must feel the DSLR is equal to film because ..well, you’re using it. You’re using it in this action feature, but if you were commissioned to DP a more traditional narrative piece like a romantic comedy, would you feel comfortable using the DSLR as a main camera and feel that it is the equal to film? What about moire & aliasing? Any problems with that? Is the resolution equal to film in your experience? You are really the only voice of authority on this at the moment as you’re working with this on a daily basis, doing film outs etc. There’s Rodney Charter as well, but you really seem to be putting it all on the line with this cam. Sorry for the long post. Thanks in advance for your response.
Also, thanks to Mike McCarthy for his great post!
Shane,
I have to say I was on the brink of purchasing a mac in an attempt to join the side that everyone was favoring for hddlsr post work. I’m looking forward to a good argument for pc editing over mac since that would be nicer on the wallet and leave more money for tools and equipment.
I had tried Cineform’s trial and was fairly impressed. I hadn’t been able to try pro-res and wasn’t sure if it would be better or not. This will definitely help me choose my next computer.
-John
Shane, I have been editing on an iMac i7 Quad core with no problems at all, using ProRes 422 and a G-Tech 2TB Raid as the scratch disk. Wondering why you would say that Macs and ProRes are dead when alot of the Pro’s like Vincent Laforet and Philip Bloom are using this workflow with great success.
ilia djondric, This is based on editing a movie not a short film. We shot and logged the equivalent of 1.5 million feet of film. Final Cut Pro is not that editing system. It is great for commercials and short films. When you see how clean the Cineform files are projected on a 40 foot screen it is pretty impressive. Vincent’s and Phillip’s work is well done and looks amazing.
Awesome info. Wish there was a solution for the enormous amount of time it takes to ingest these files into the AVID. Makes Final Cut look desirable. Mike’s insight is very helpful and excellent for all editors to read.
By the way….PC has been the raining AVID platform for years!
By decompression do you mean cineform? Because is that not available as a standalone capture program for Mac also, meaning you don’t have to use prores because you can use Cineform MOV files in FCP
Don’t get me wrong I love my PC with Sony Vegas Pro + Cineform AVI, but I do a lot of editing on both and FCP is a gem also.
I loved this tutorial , I need to implement this workflow ASAP especially naming and logging my footage. It was really useful, can’t wait for part two !!!
Also I recommend trying to implement a feature on your blog so that you can reply directly underneath people’s messages with a reply button. Like most other blogs do. This would make it easier to sort through all the comments
for ease of use and learning.
So Shane…are you saying you edited that film on an Avid system running on a pc using Cineform as your compression?
Ken Glassing
ken glassing, first off I want to say how much I love your work and the visuals that you are creating. You are an incredibly talented DP and I thank you for all of your support on this blog. Yes we edited everything on the Avid and used Cineform. I have been very happy with what I am seeing on the big screen.
While both parts of that statement are true, it is not entirely accurate. We did “edit everything on the Avid” for the Seal movie, but that is a DNxHD36 offline. We “used Cineform” as an online codec, for finishing in CS4 at 1080p24 RGB. Someday it would be great if Avid could edit Cineform files natively thru AMA, but that day has not yet come. Maybe we could all stop by Avid’s booth at NAB and request native support for Cineform. (Or AMA support for Canon MOVs directly) Until then the solution will continue to be transcoding to DNxHD on import. There will be more info on the editorial aspect of post in “Part 2” which is coming soon.
“It is all about PC rules, Mac and Pro Res are dead.
That’s a fucking joke.
Here’s the new ARRI Alexa
http://www.engadget.com/2010/04/07/arris-alexa-busts-out-native-prores-recording-plans-for-red-sm/
And oh, it shoots ProRes 444 too…
I will be laughing the rest of day because of your comment. Thank you.
Jay, I love it when people are so passionate they run into a freight train. I am a Mac guy through and through. I tried to persuade the post production to go with Apple, but I was blown away with the ease, depth and better decompression qualities of cineform. I have shot film my whole life, until this little camera came along. Arri, Panavision, I have used them all and they still are on the outer edge of the 70’s in their digital technology. Making a camera that delivers RAW images on there shitty sensor will give you great clean images that look like video, period, the end.
Shane…Thanks so much for the kind words…this forum has tranformed the way I shoot…I fully believe these cams are the way forward for all of us involved in capturing images for storytelling. My hiatus is approaching…let’s meet up!
Best Regards
Ken Glassing
ken glassing, I would love that.
Gotta love the Hurlblog! Please keep it coming. Great “inside” stuff. Learning loads from you all.
Paul Bahn, thank you for the support. I am glad you are finding some great information.
I am new to DSLR’s and have read that PC’s are better to use than Apple. Please let me know details of the PC system to get and the costs? And is Cineform expensive? Is it an AVID product or plate form? I would love for all this information to be put on video training DV.
Oh no, I didn’t mean to start a Mac/PC argument. I’ve used both and have far more good things to say about both than I have bad things to say about either, but I just think it’s tiring to see so much mac mac mac talk in filmaking circles these days, when there’s so much to be said for other platforms. I only wish that the discussion was more balanced, not more PC-centric.
Simplest way to explain for me is: I’m a film student with a starvingstudent-sized hardware budget. I have a 64-bit quad-core computer running at 2.66ghz with 8GB of ram, dual 7200RPM hard drives in internal RAID configuration, Nvidia graphics card w/ CUDA and 1GB on board, 22 inch IPS display. Analog 7.1 Surround sound or optical audio and HDMI out. I use premiere/AE and Cineform. I can edit 1080p24 in real time with colour correction applied, without dropping a frame. Replaced the fan for ten bucks and it runs silent.
My computer (hardware and OS only) cost $760. Canadian. Including the monitor.
I have no doubt whatsoever that a mac/FCP system would also make me happy and be more stable, more… silver, whatever. But look at those specs, and price out a mac pro at that level.
For me, the decision was clear, for a professional user with a different set of circumstances, things may be different.
I’m positive that employing the Task Manager to kill particular processes in fact restores some speed to my once in a while sluggish MyTouch 3G original. But merely because I kill all and things seem improved doesn’t mean I haven’t done something superfluous for many of the processes killed. It may have been a singular app that was causing the problem. Kondik’s argument on twitter (and I would think that his voice is the voice of somebody, just like google technologists, who has some groundwork in fact and applied science for what he’s saying) was that, not resisting a rogue application misconducting, exercise of the Task Manager to kill all apps was a placebo.
Unless you’re using a camera and codec that is less compressed than the 5D ii, cineform has no advantage over pro res. FCP people should use pro res, everyone else should use cineform.
Pro Res has a lot room for pushing colors using Apple Color.
Try out the iPad with the Movie Slate app for slating and logging. It works quite well in creating an excel log similar to what you have above but is a little easier to create and you have more options. Then, use adobe bridge to edit the clip metadata to match the shot log the app creates.
Shane, first off I’ll love to say, before this whole DSLR thing, I had always been a film guy, because that’s basically all they thought in film school. I was one of the heavy DSLR critics until I saw what you and your team have done with it. Currently, I’m shooting my new feature all DSLR, and the cineform codec is doing magic for me. The recent release of media composer 5.0.3 supports cineform codec with AMA, and that’s a darling. You’ll definitely be one of the revolutionist whom I’ll invite for a screening of the film on the big screen.
Keep up the good work Boss!
Iyke C, thank you so much for those kind words and I cannot wait to be there in the screening room with you. VIVA Revolution!!!!
Definitely Shane. I won’t ask you to make a public show of your information, but this is my email At anytime you can contact me, so I can know the best way to get hold of you once the film is done. As I said, it will be an honor to have you critique my first DSLR venture.
God bless!
Iyke C, sounds good. Looking forward to it.
Good read, thanks much for this posting.
nice information