Exposing Your Image Using False Color on a Flanders Scientific Monitor
You all have heard me talk many times about getting that “sweet spot” and “dialing in my exposure.” A few of you who attended the Illumination Experience Tour were able to see it firsthand. Now I’m giving you the keys to the secret of False Color. Understanding the values and how it relates to the image on the screen from the camera is key. Let’s walk through this together.
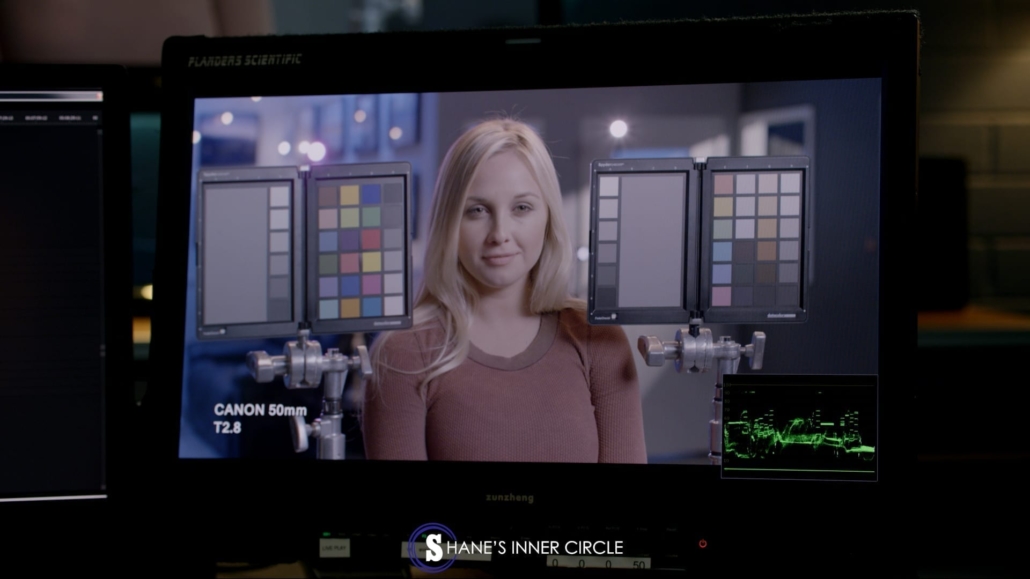
The waveform monitor has been the main way for people to expose their digital sensor. With a waveform monitor, you have 0 for your blacks, 50 for your medium gray, and 100, which is clipped.
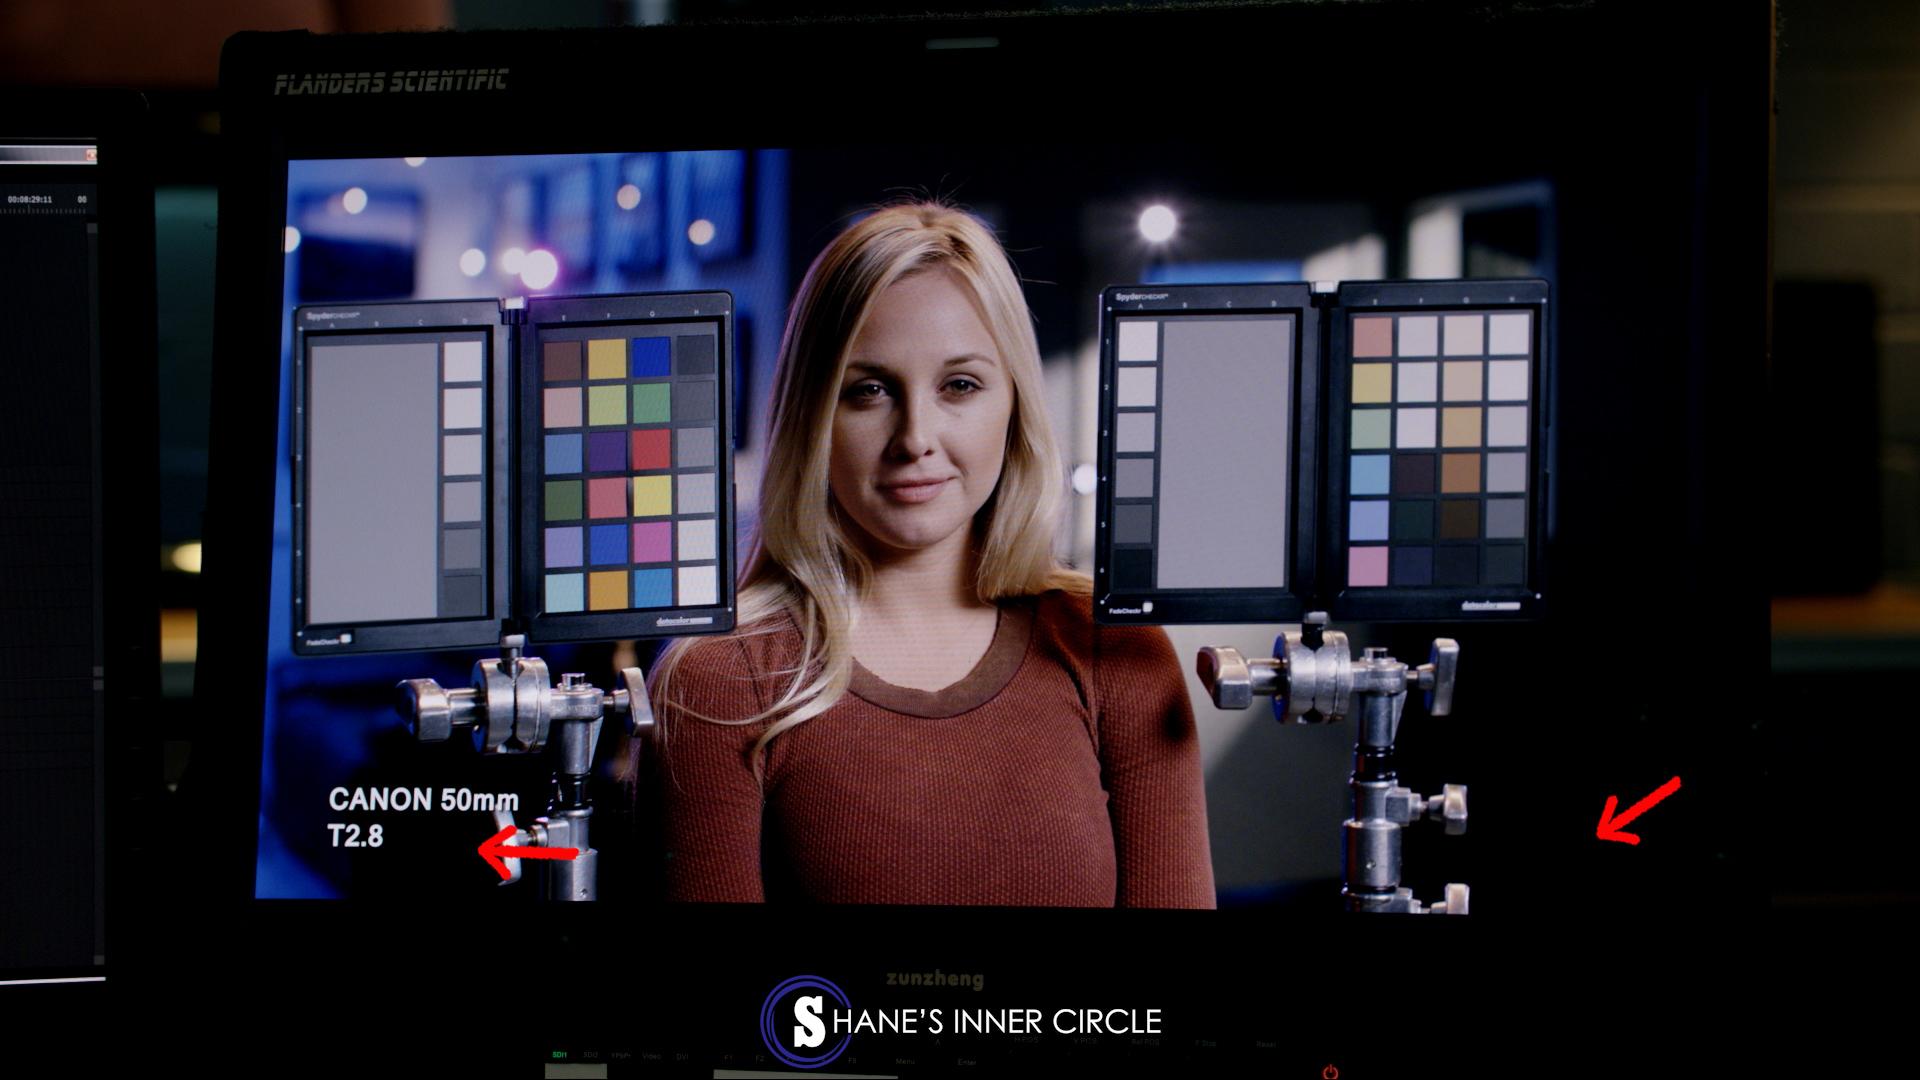
Notice the waveform monitor in the bottom right.
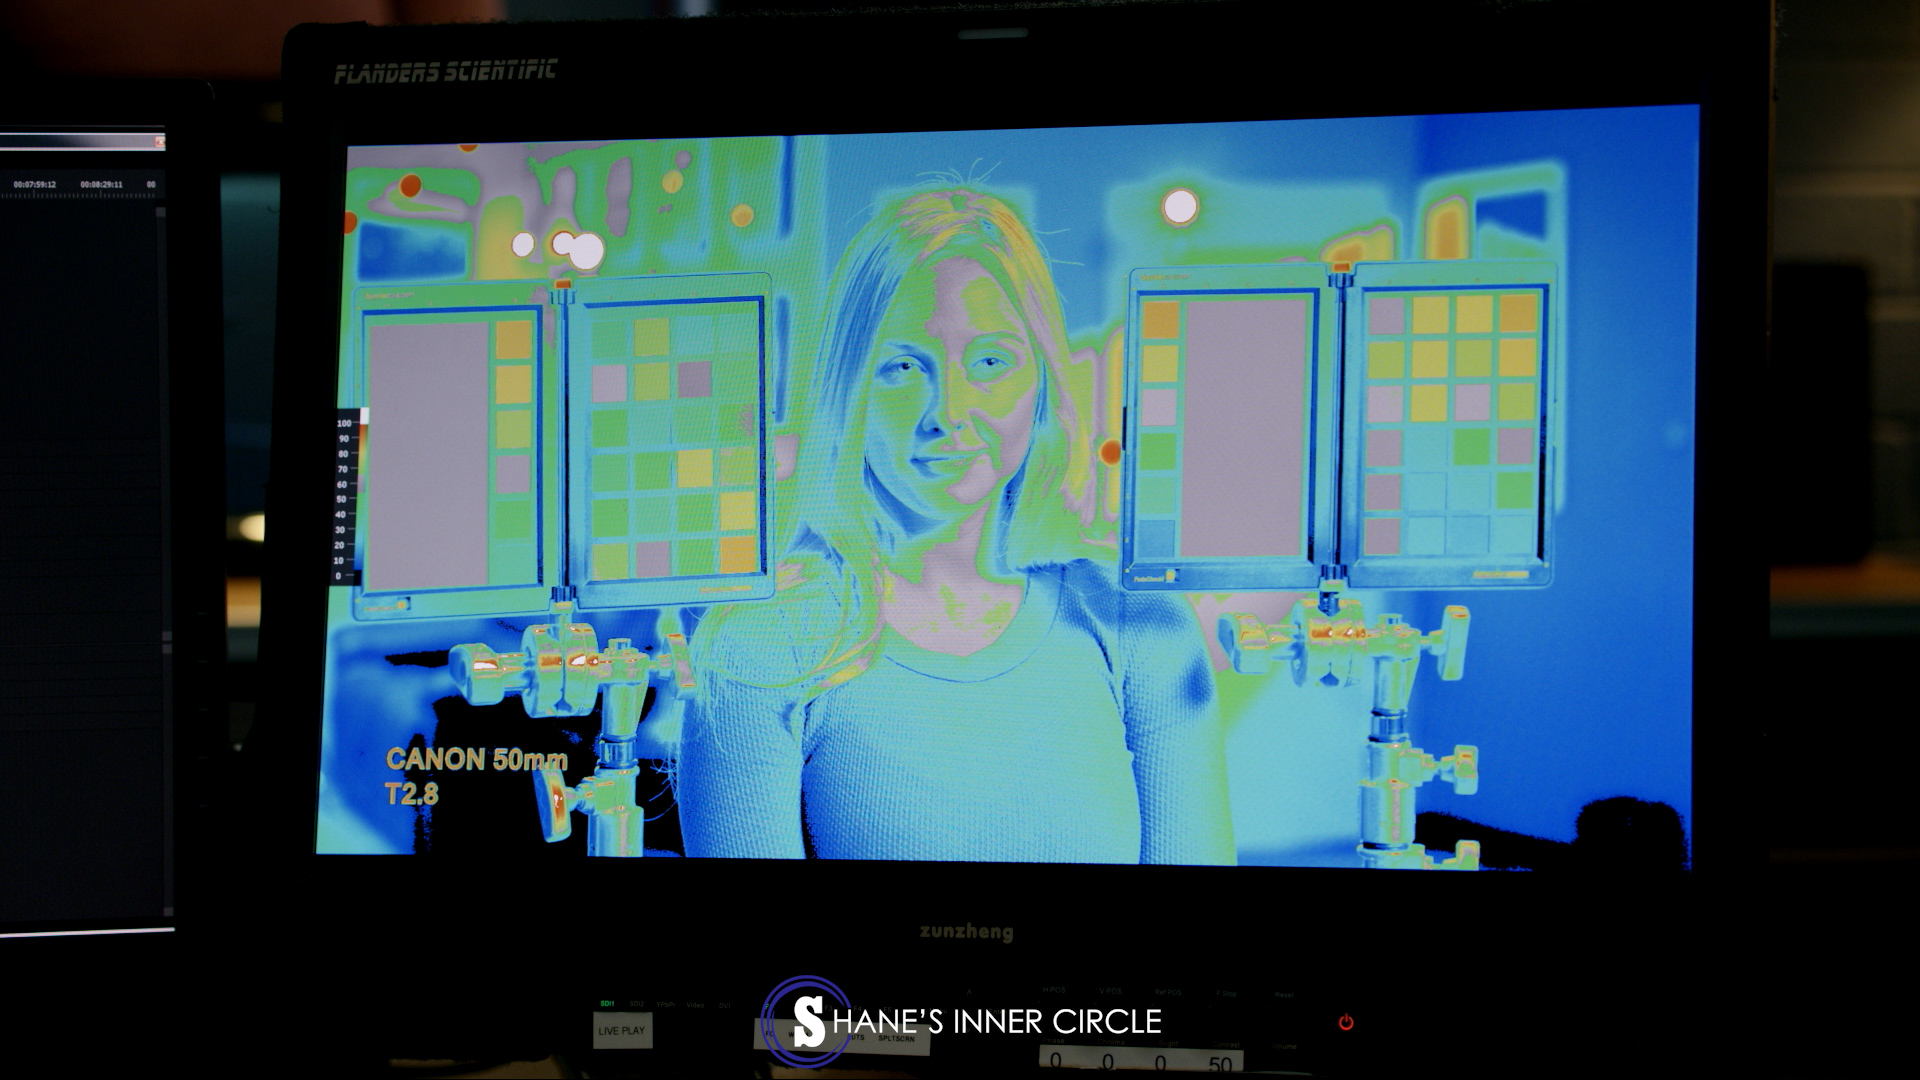
With the waveform monitor, you’re able to see a lot of where you have your exposure, but you can’t see the specific exposure of different areas. Today we have amazing technology with exposure tools to help you. With false color, you can literally see each specific area’s IRE value. You can see what her face is reading at, you can see what the background is reading at, and with any area you can see the exact exposure.
Using the Flanders Scientific Monitors:
The Flanders Scientific monitors have been my eyes in this digital landscape, and with these monitors, you can assign each button to have the function you’d like. With our monitor, we’ve assigned our false color function to the F1 button.
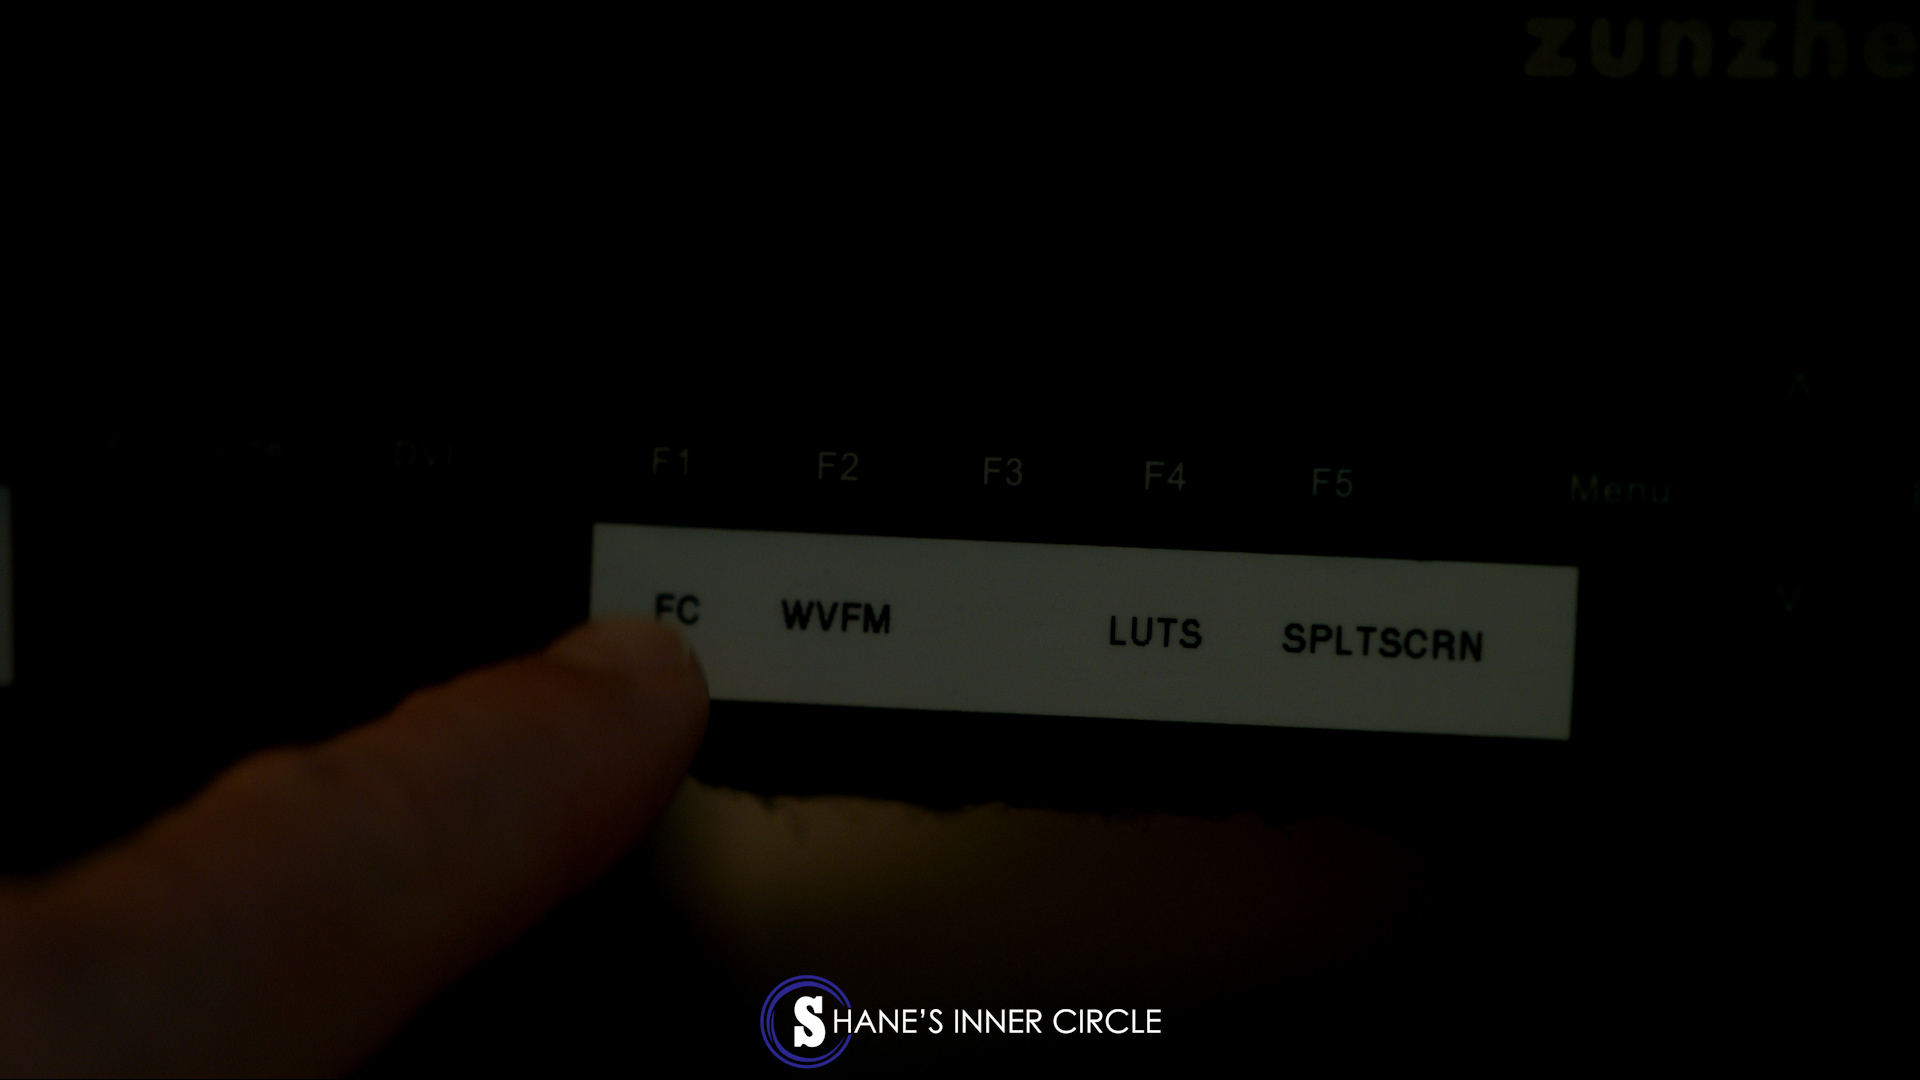
Notice we labeled what we have each button assigned as.
Currently I have a log image, but when I push the F1 button to turn on our false color, this is what I get on the monitor:
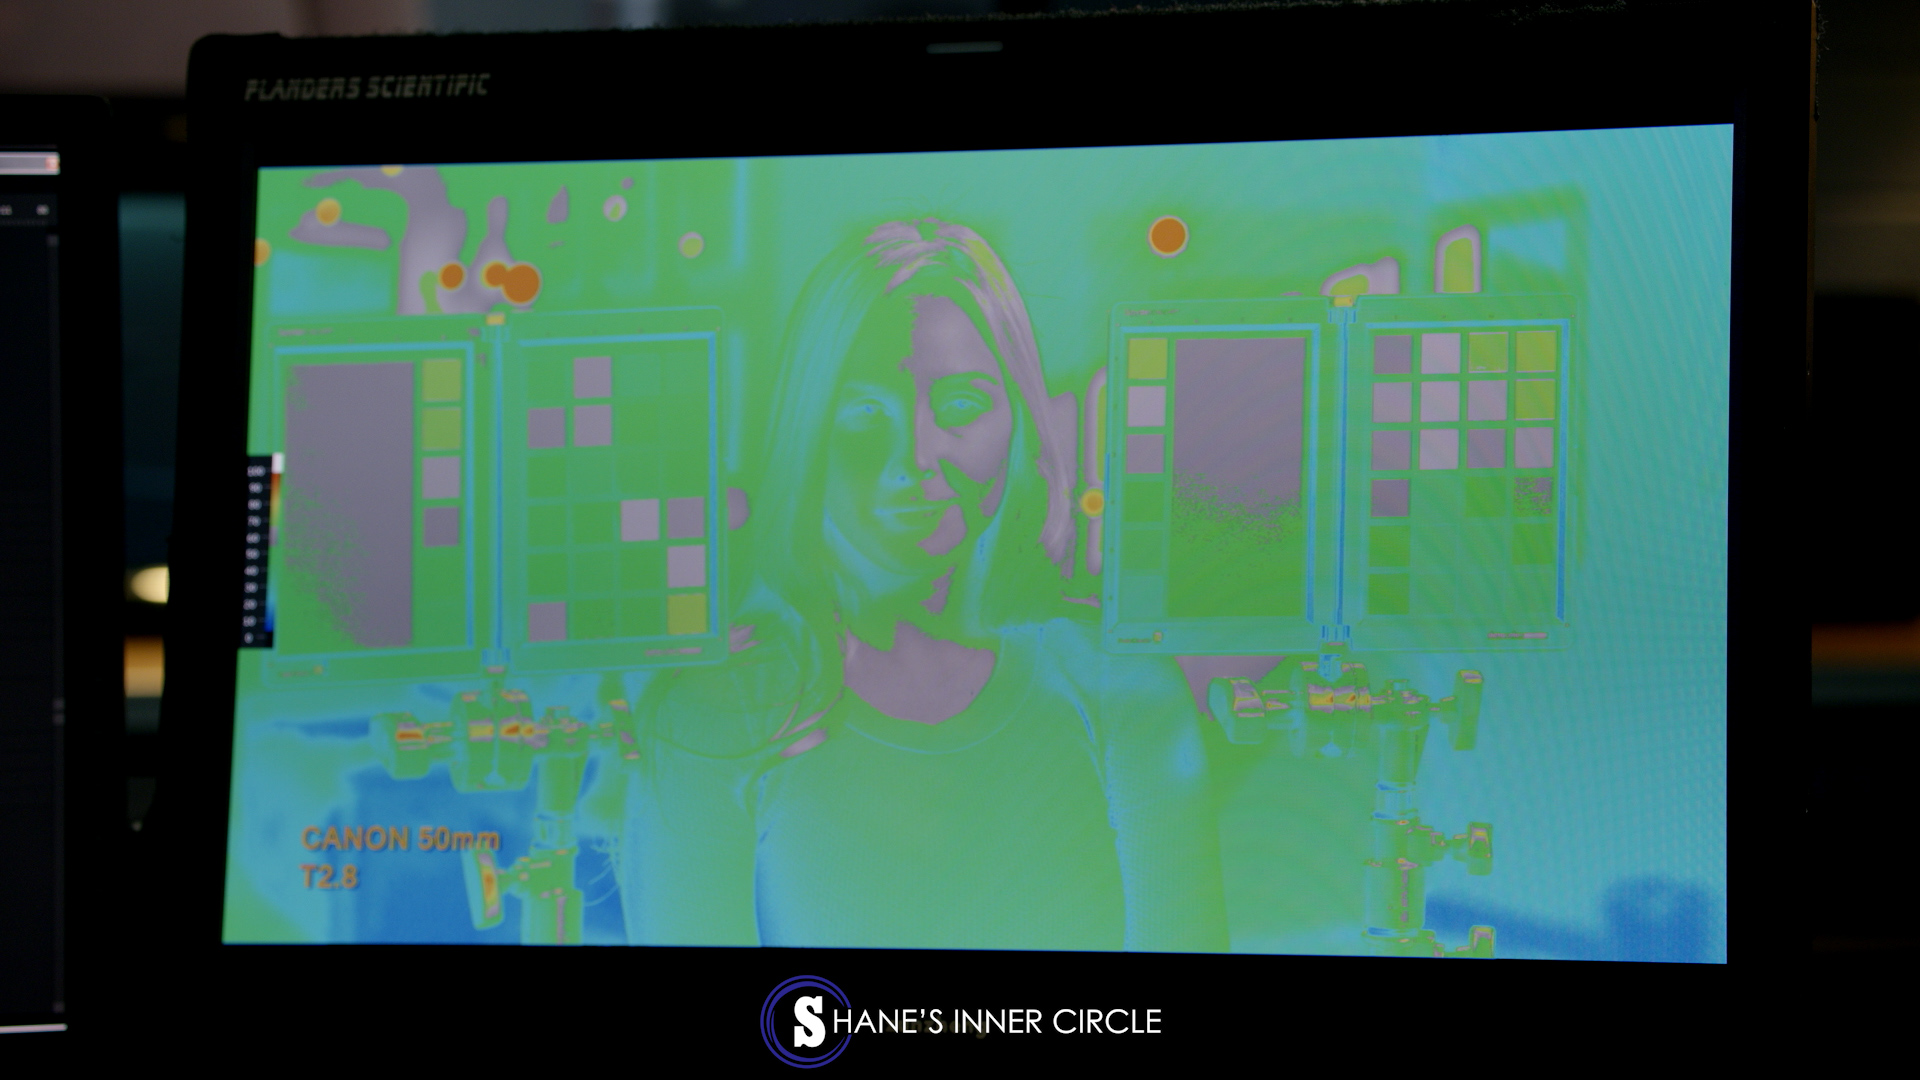
False color turned on
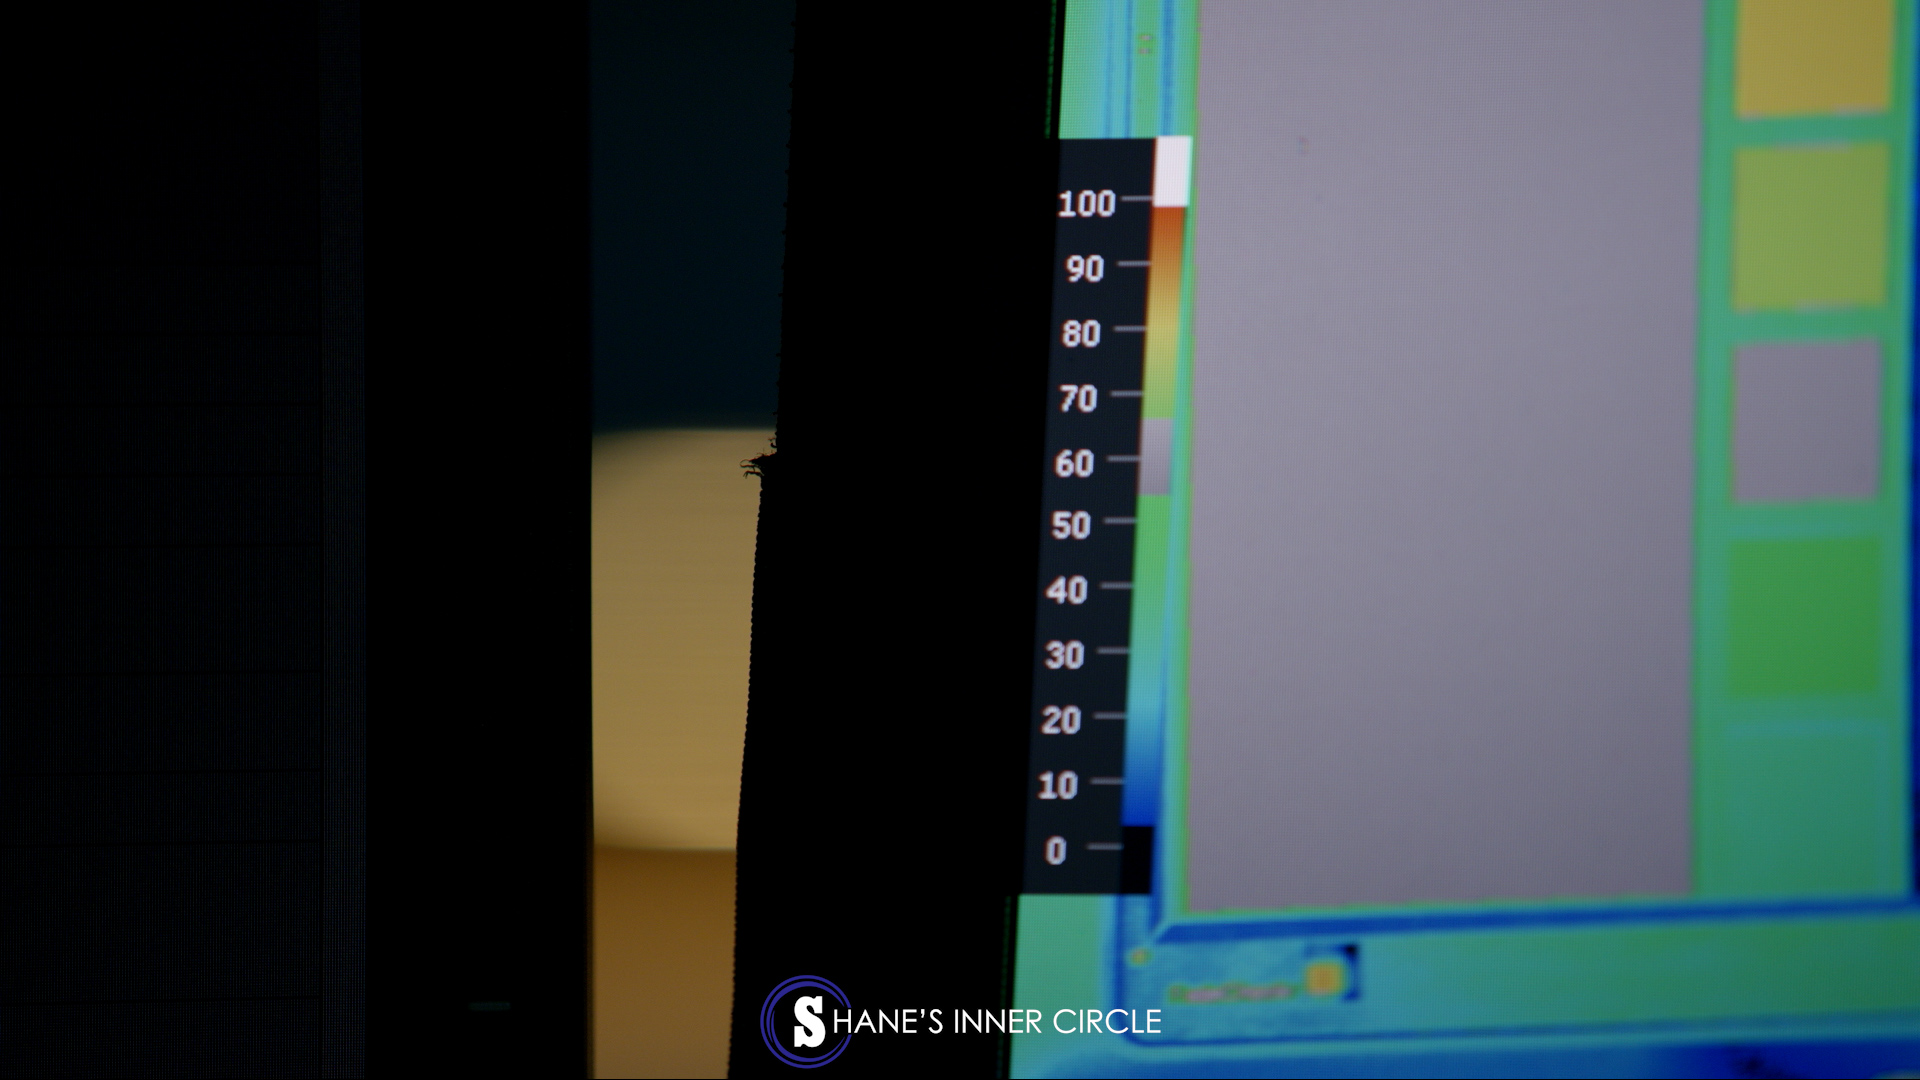
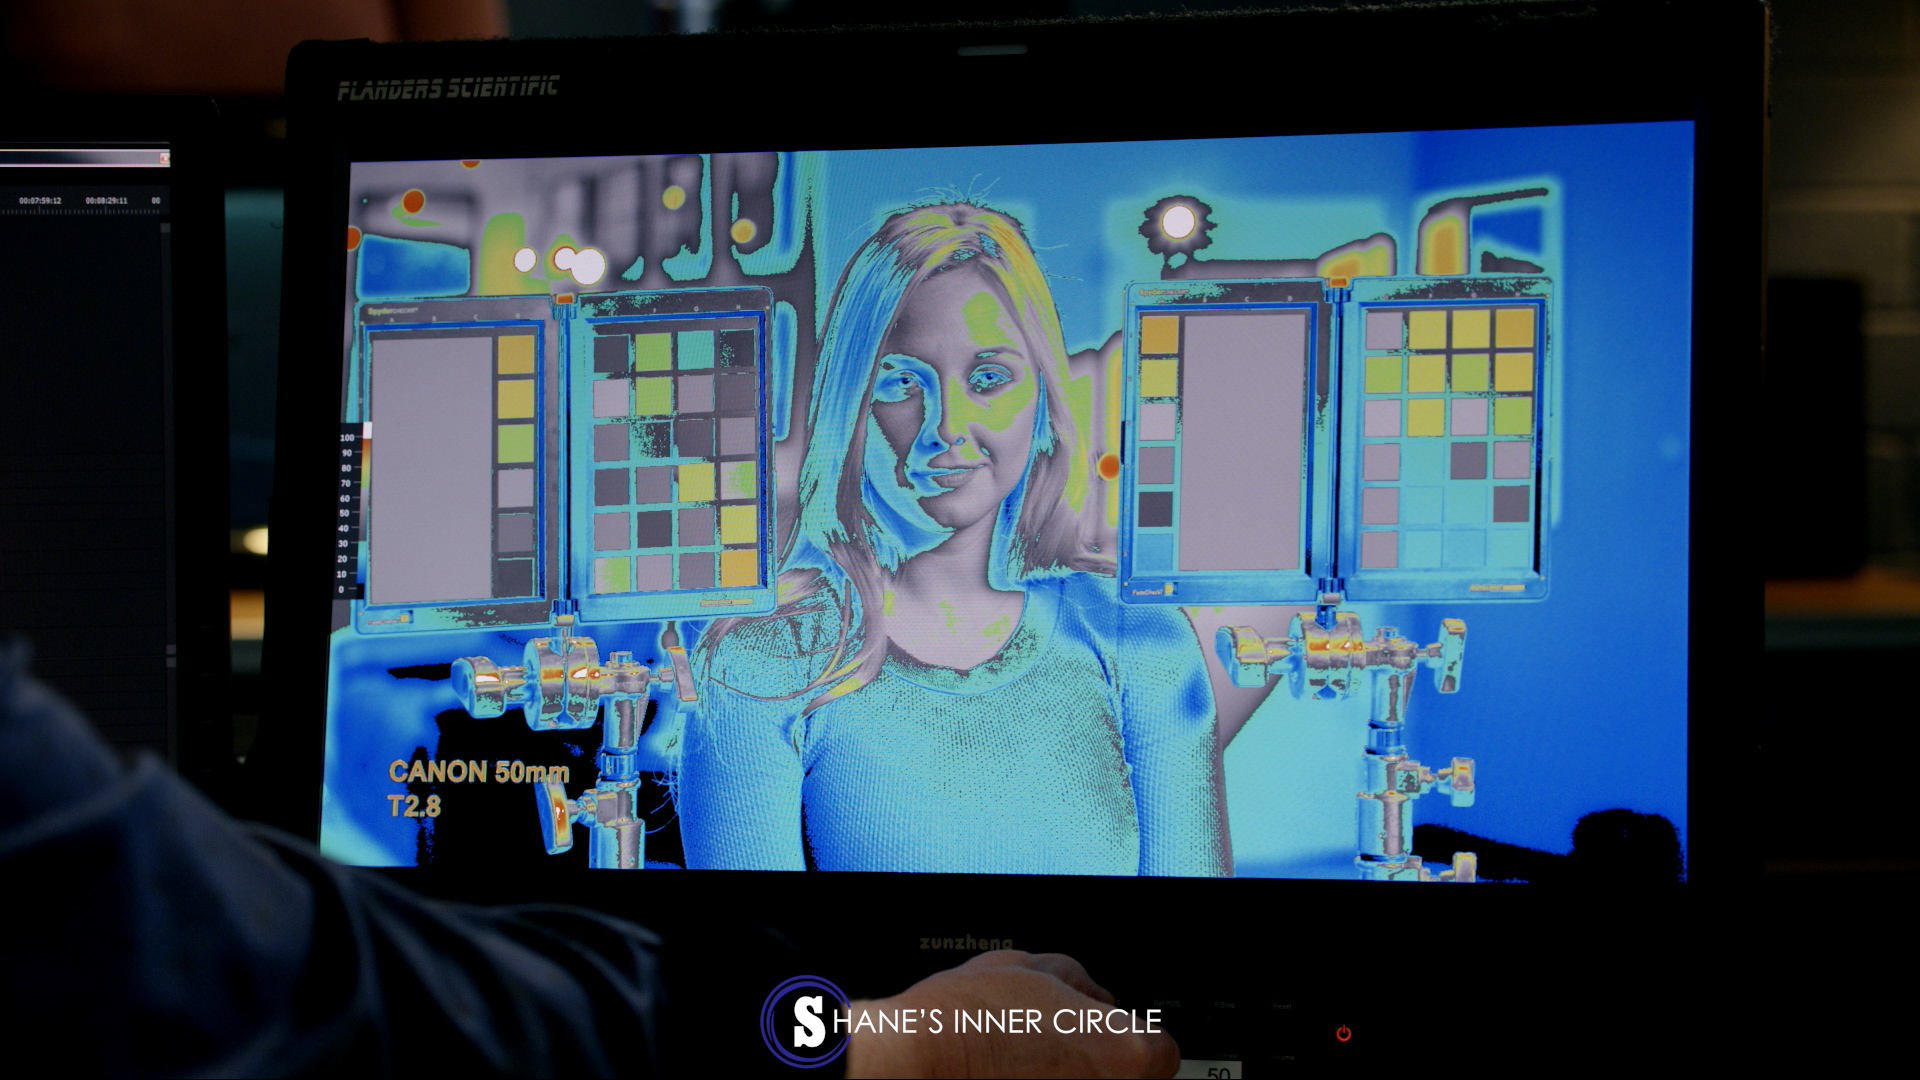
With this false color view, you can see all of your colors, and on the left, you have your scale that has all of your IRE values. Zero means absolute black, and 100 means clipping.
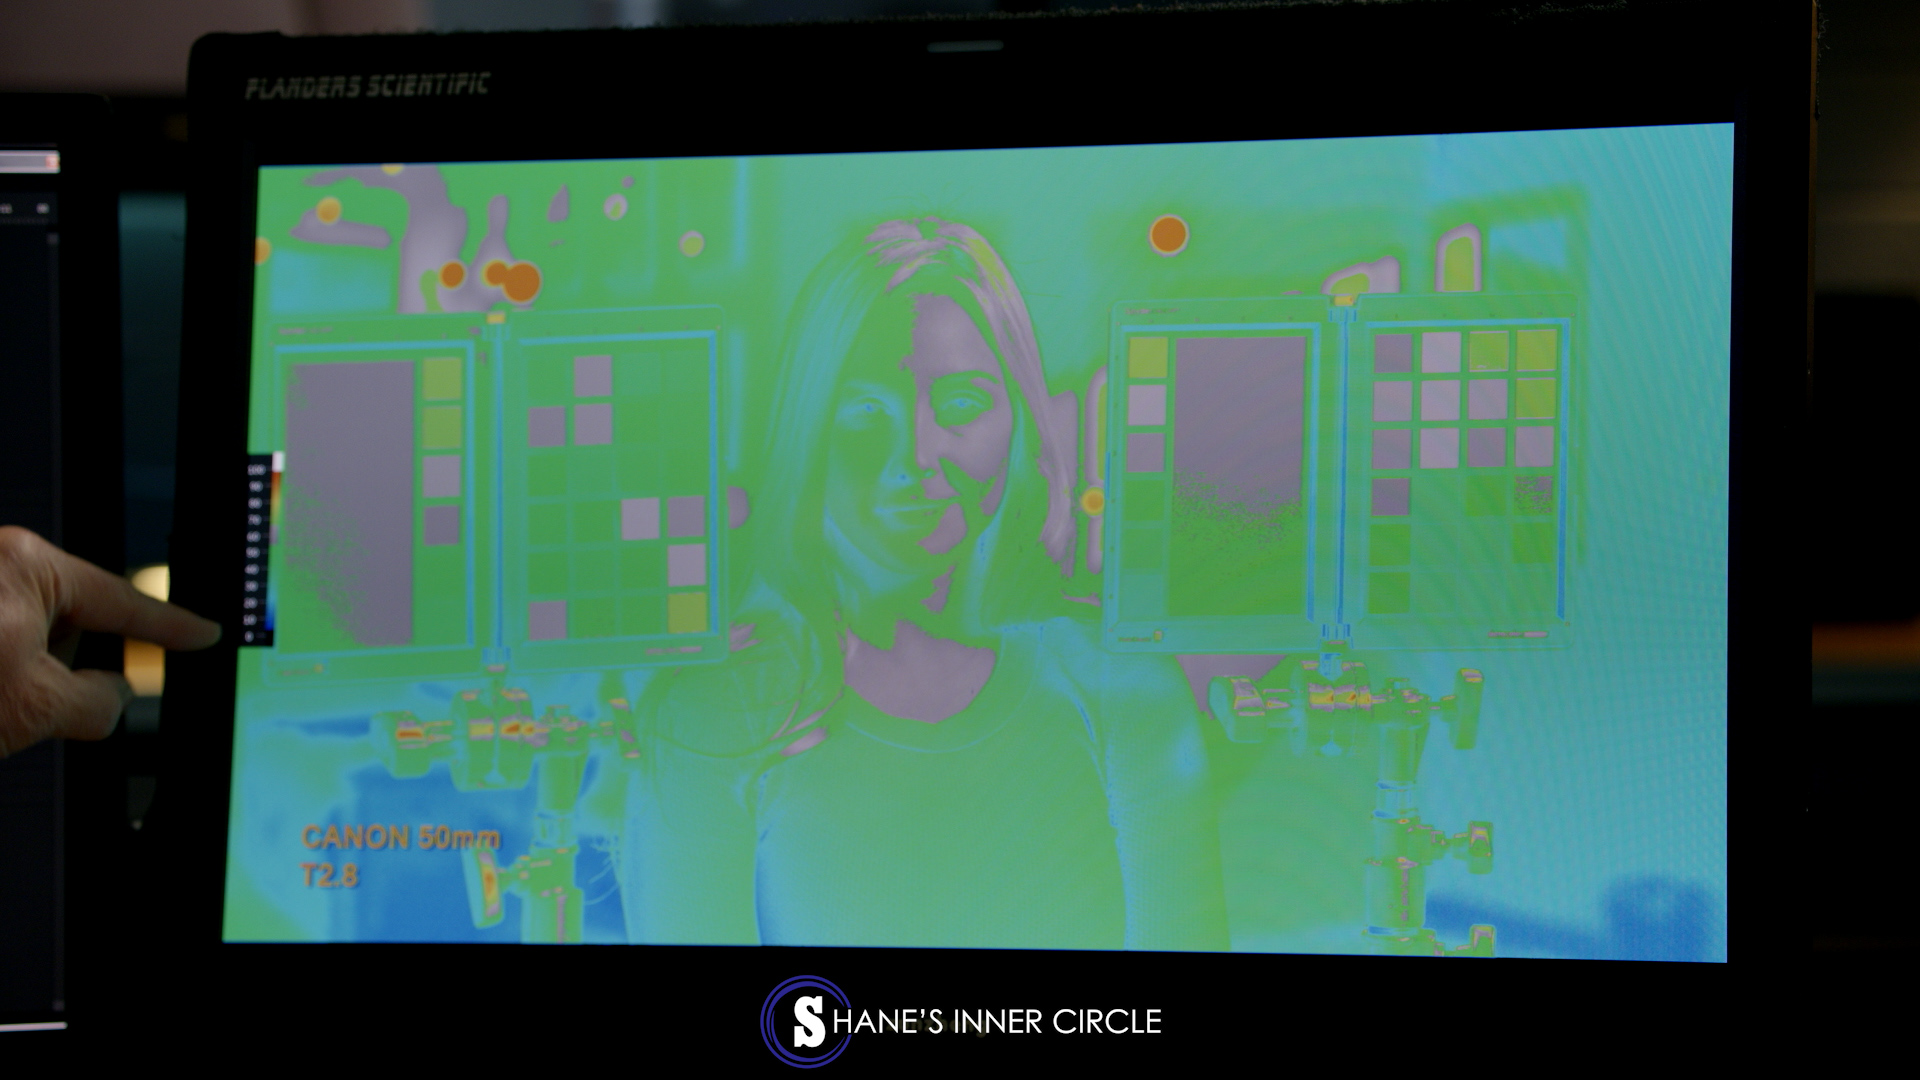
Notice the scale on the left.
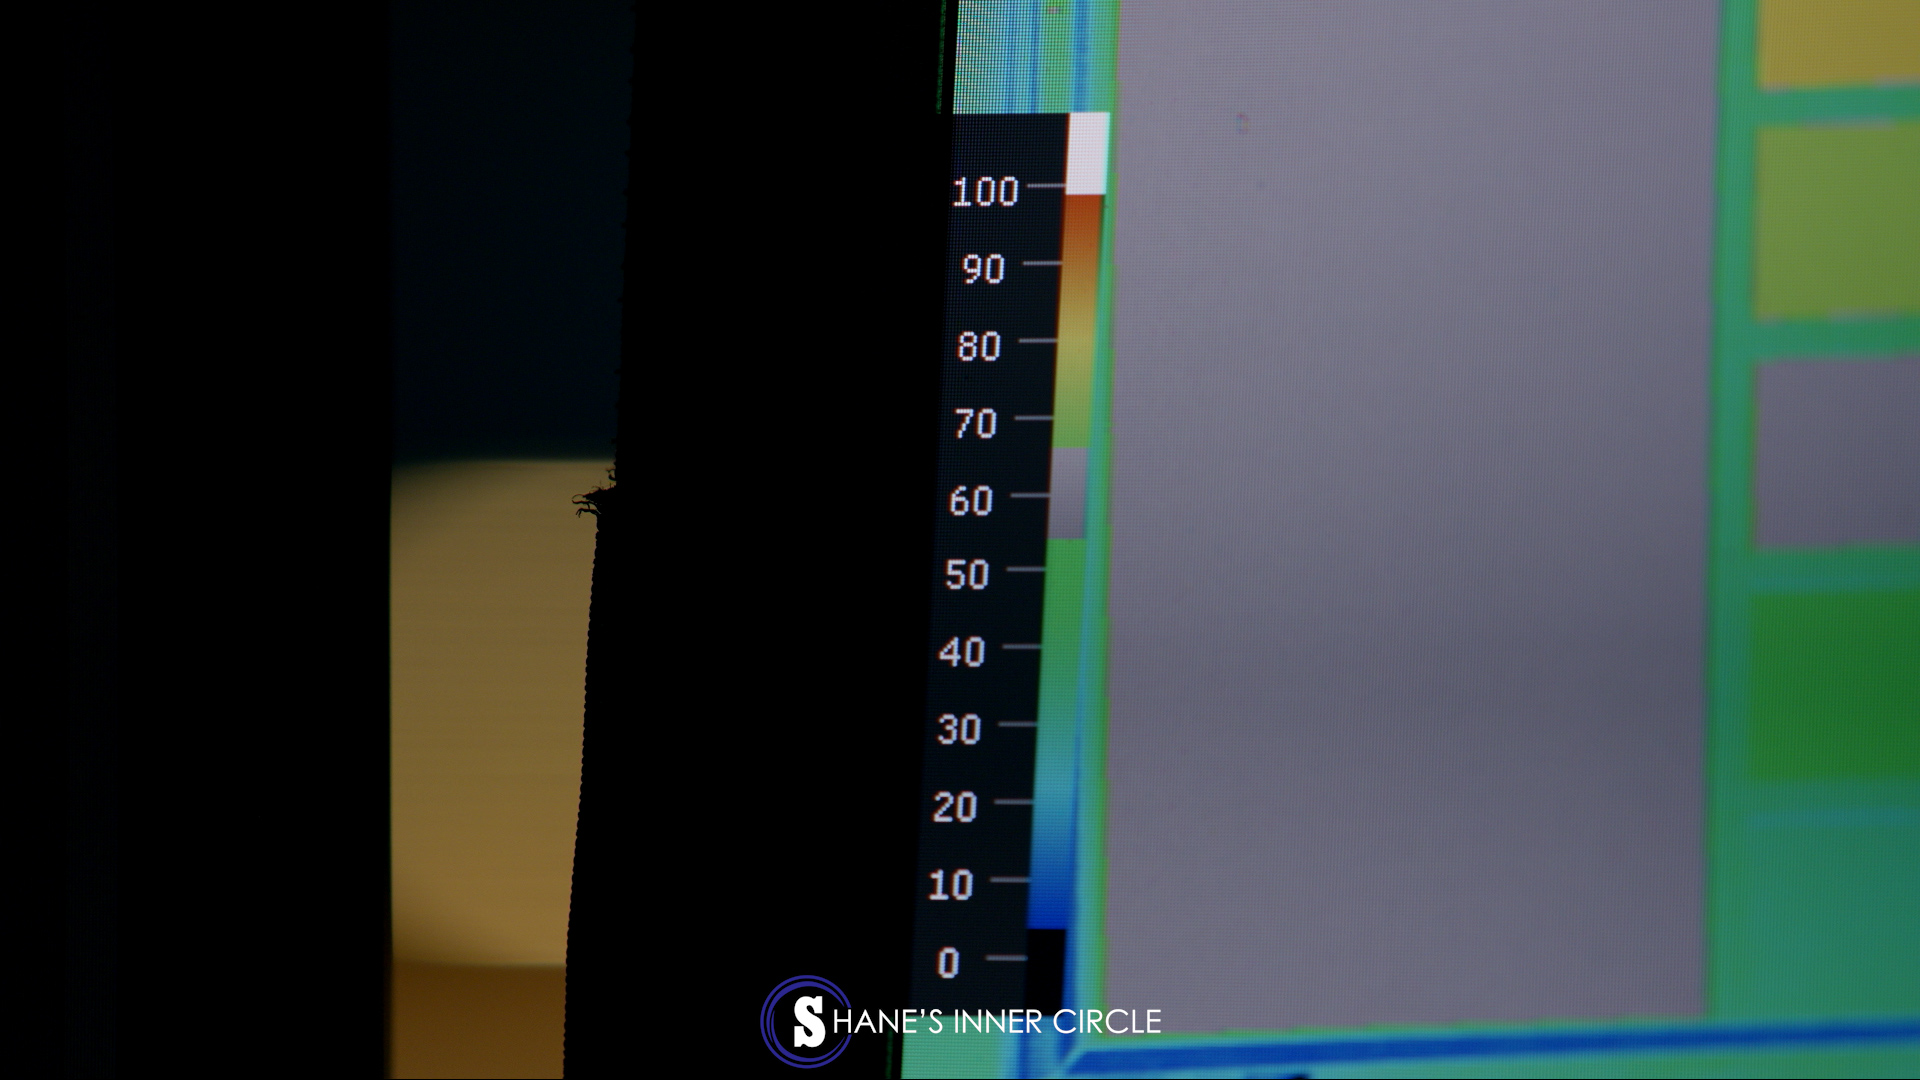
The scale shows your IRE values.
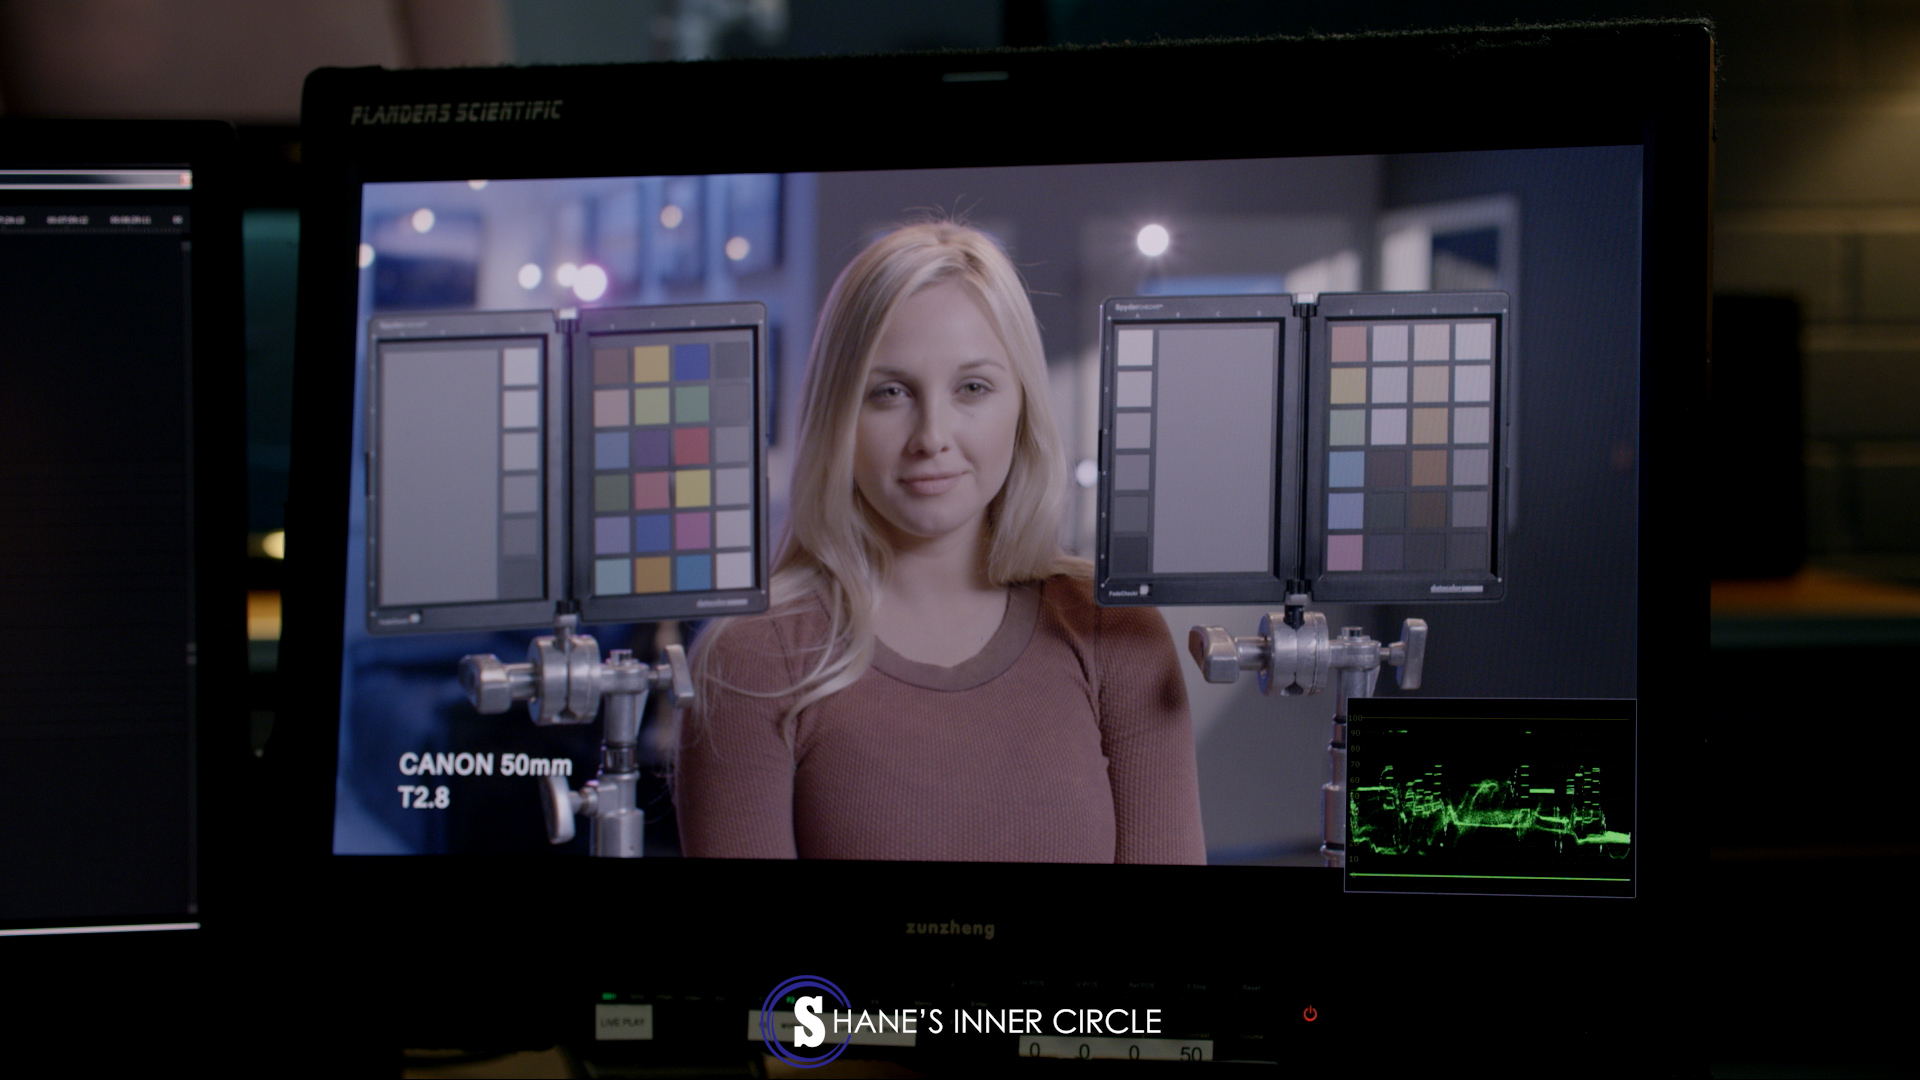
When using false color, I don’t like to use it with a raw image because the file is flat and it won’t be what the final image looks like. So what I like to do is put my look up table on before turning on the false color. With the Flanders Scientific monitor, you can load in sixteen different LUTs and assign them to a button on the monitor. Today’s LUT is Neutral Day Interior.
Redlog film image
With the Neutral Day Interior LUT on
Adjusting Levels:
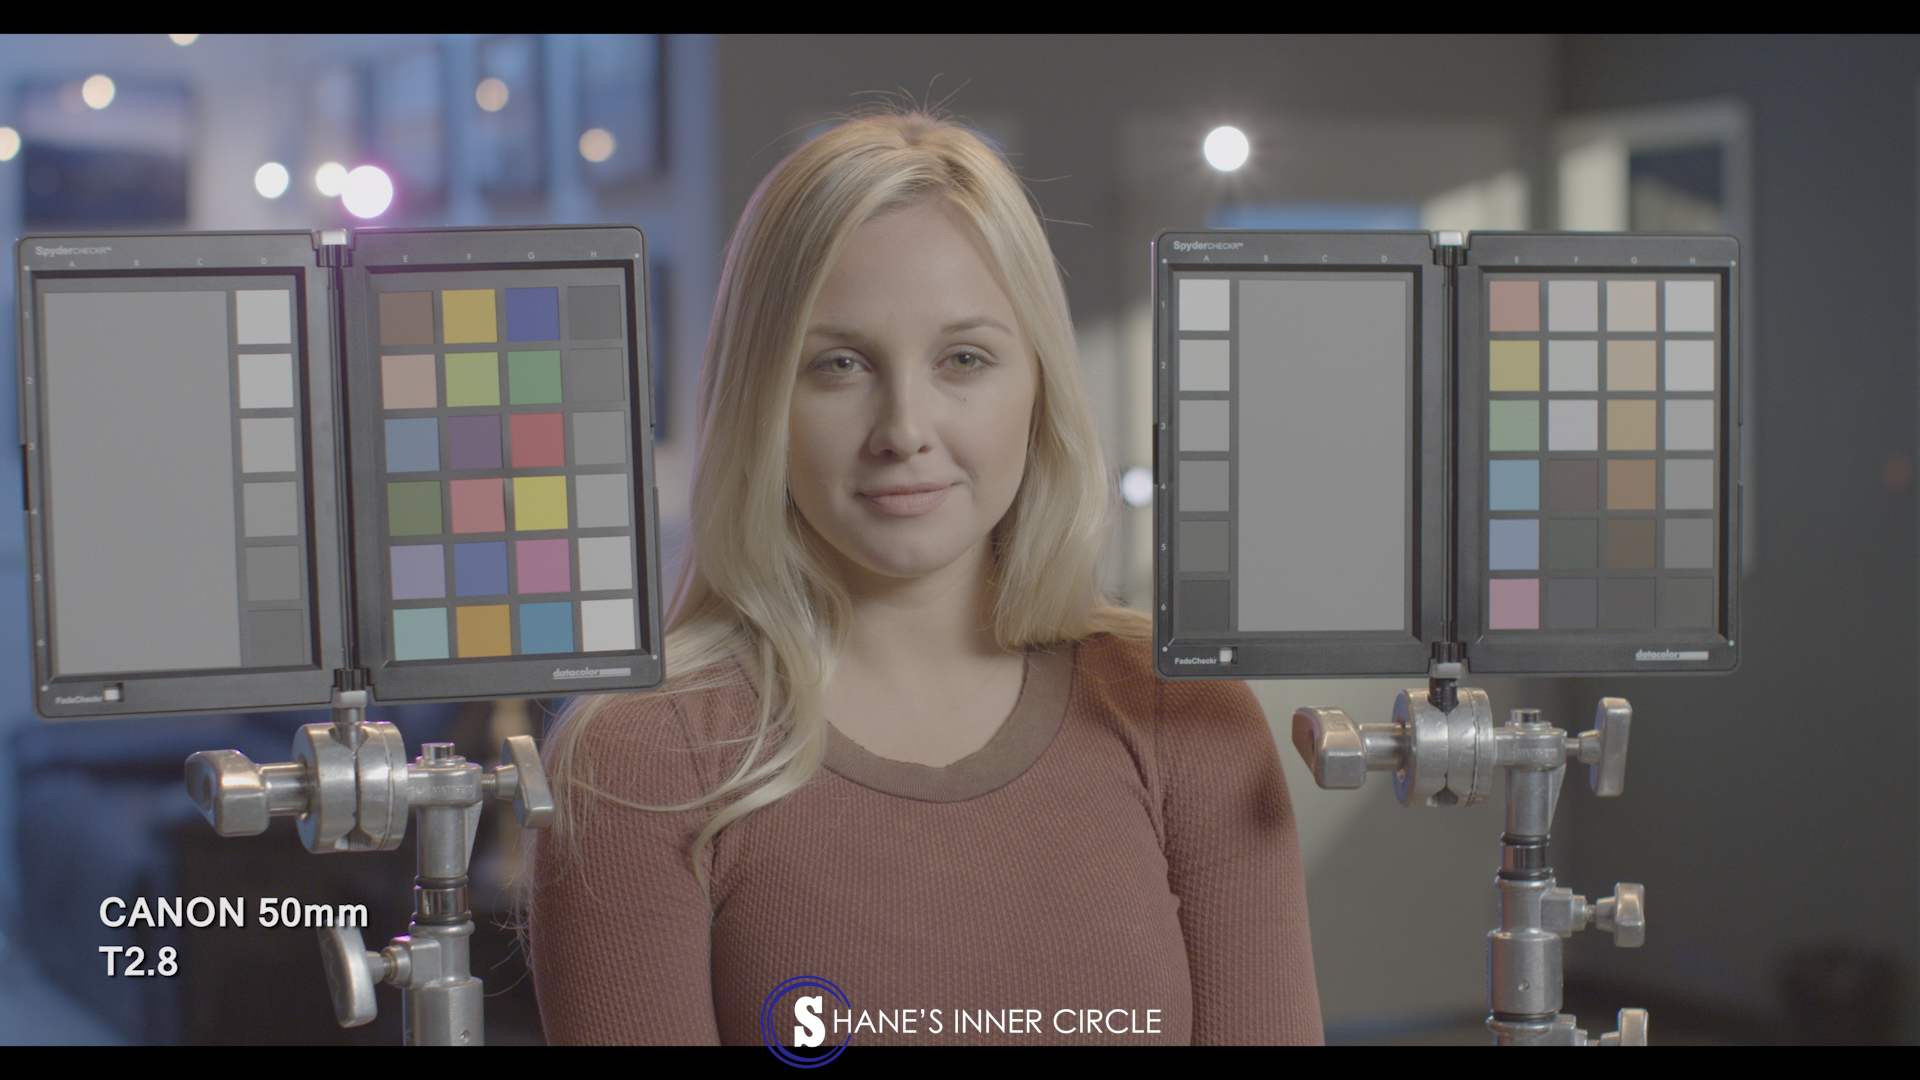
Adjusting the levels on your monitor does not affect your image. It’s just you shifting around your levels of exposure so you can see and set your exposure to how you want it. When I’m lighting an interview situation like this, I like to have my skin tones overexposed about a stop, which is about 55-65 IRE on the RED Dragon sensor. The medium gray on our Datacolor chart is between 55-65 IRE. Her face is also reading around the same level.
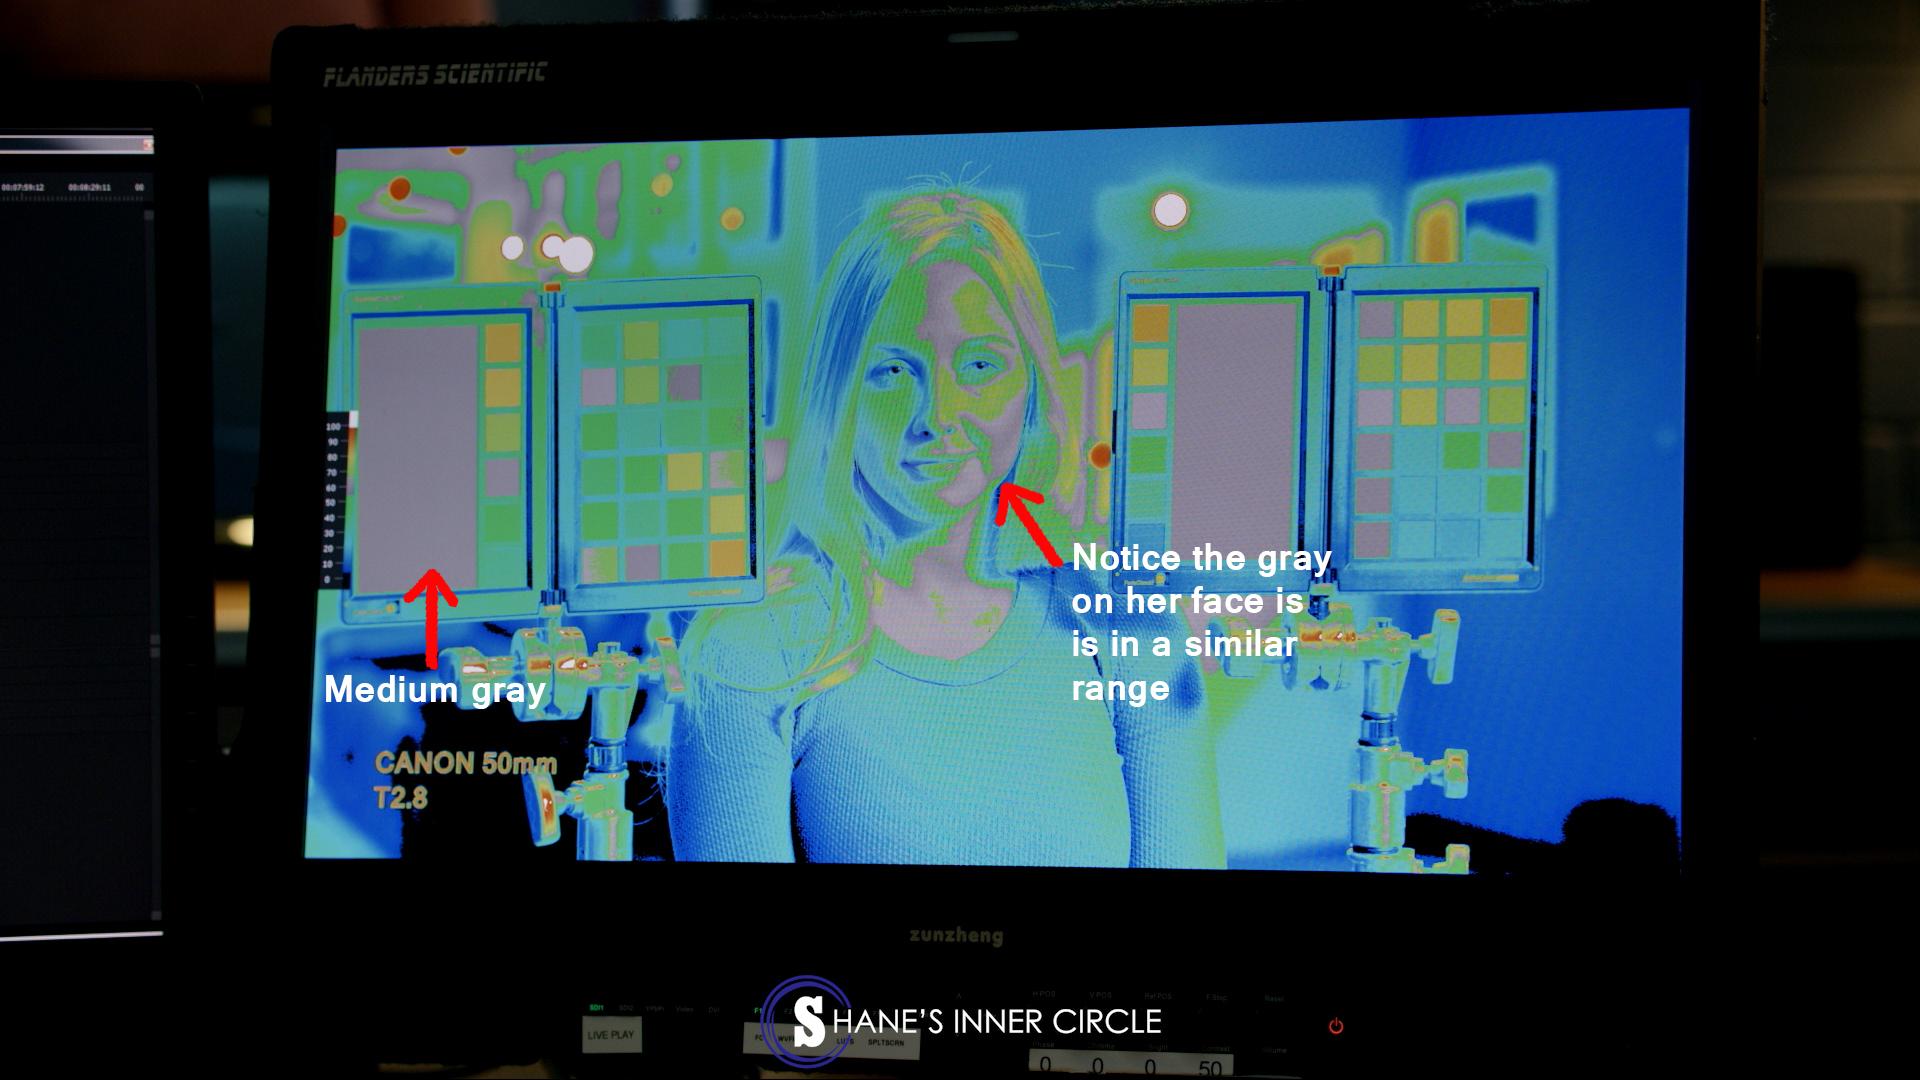
Notice that there are a lot of medium gray tones on her face.
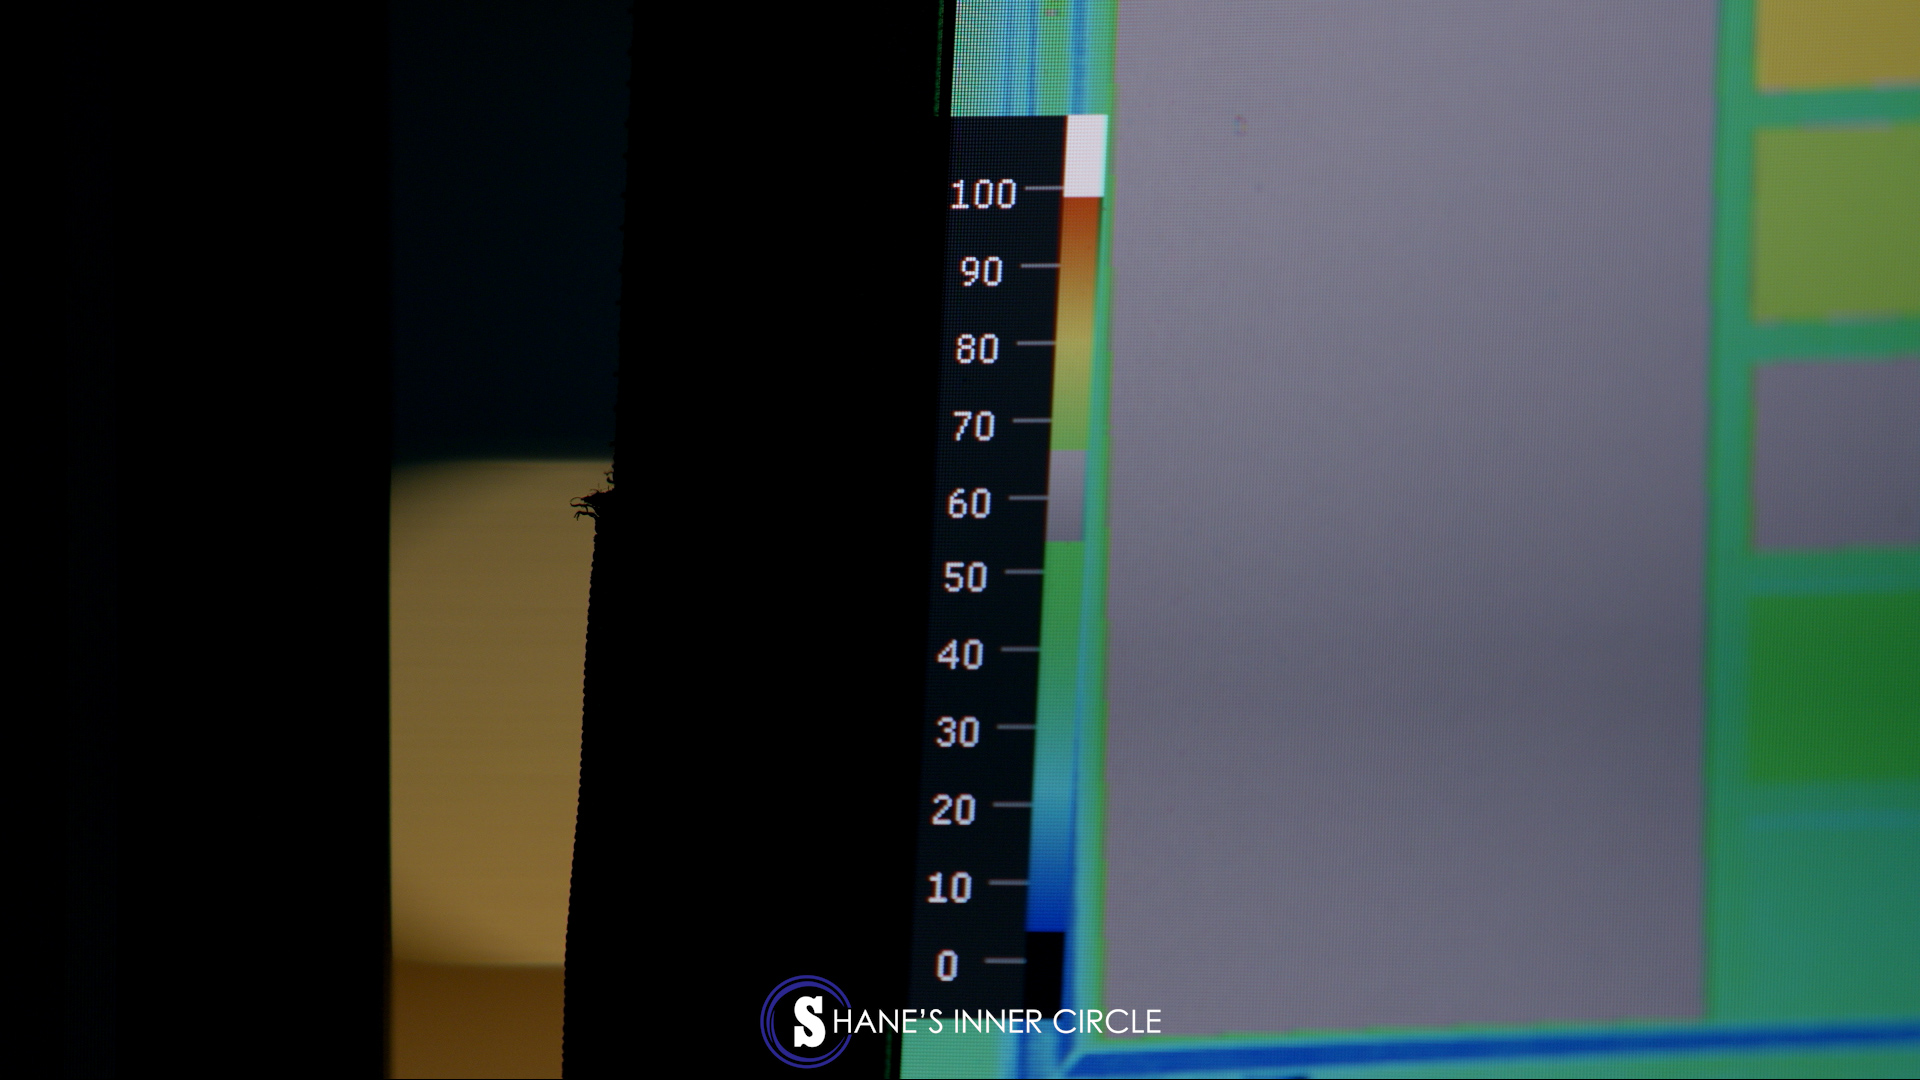
The scale currently reading at 55-65 IRE.
Black Levels:
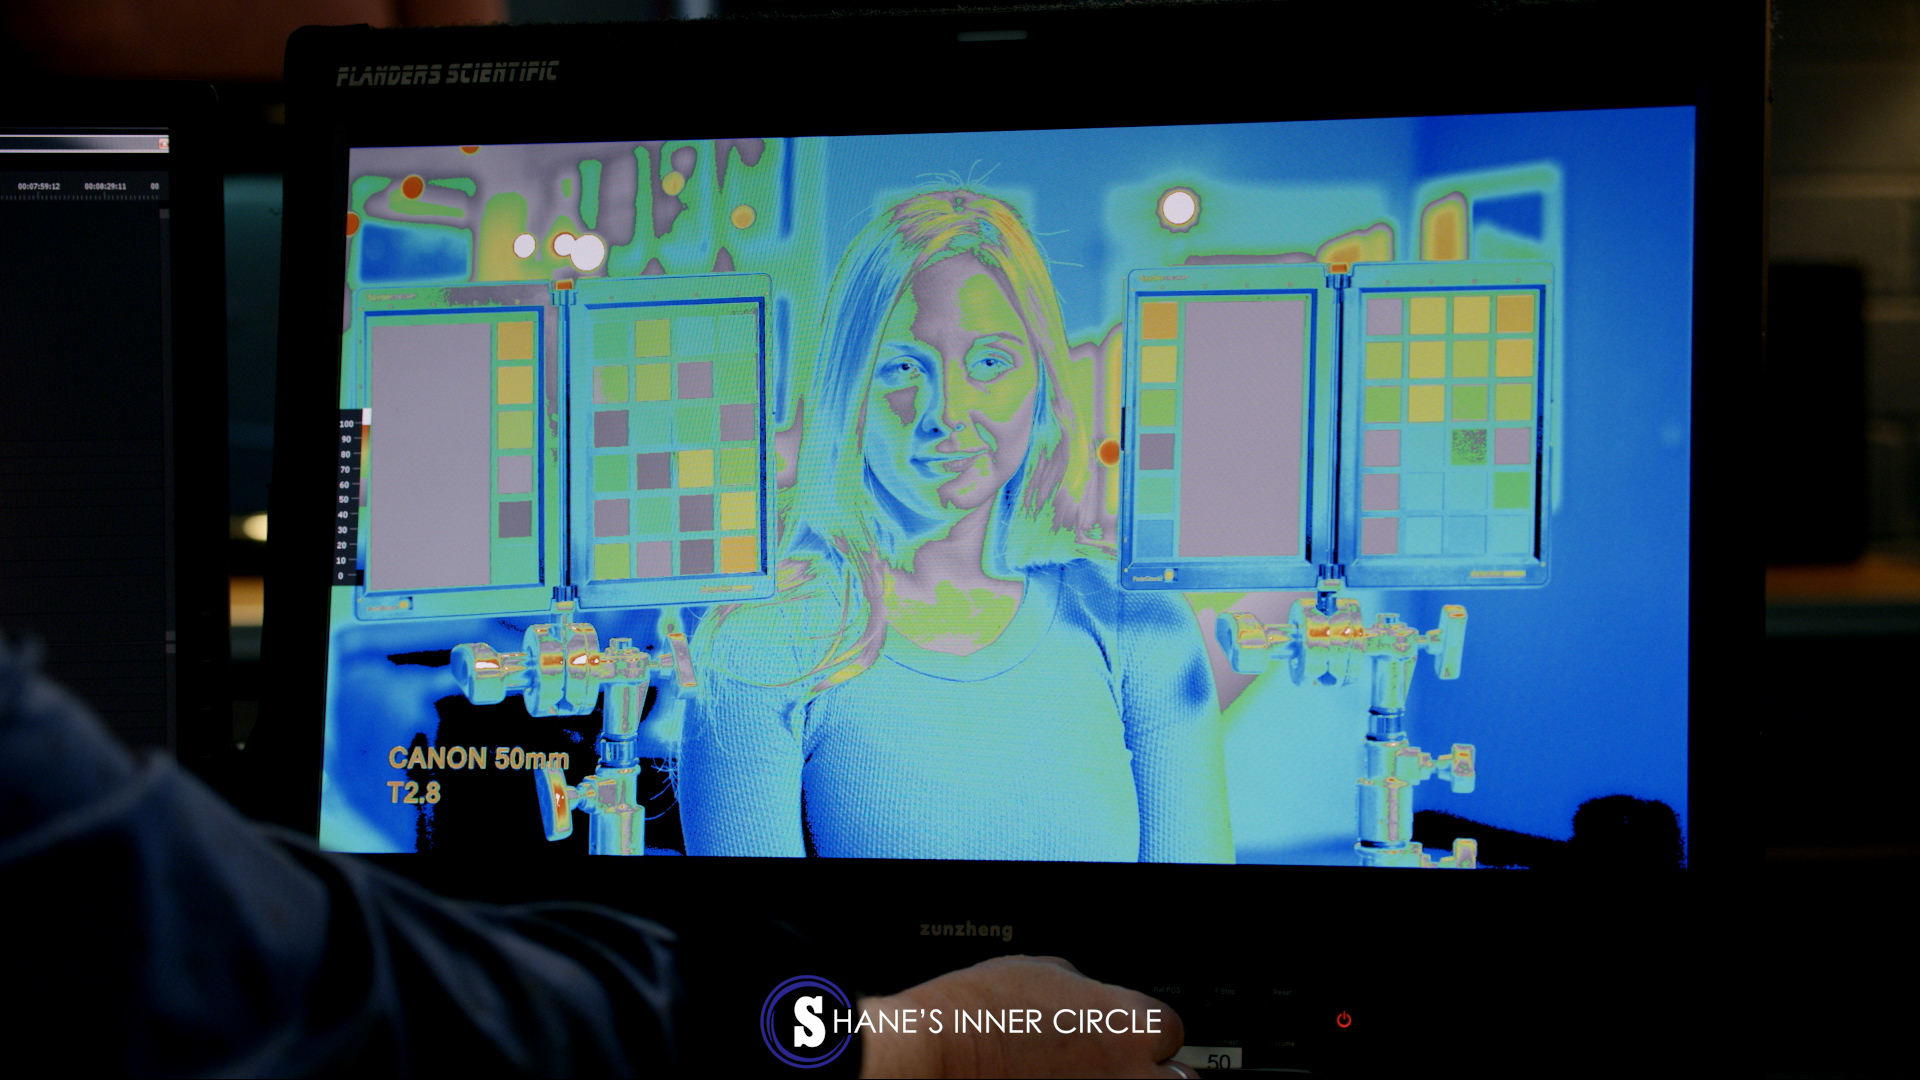
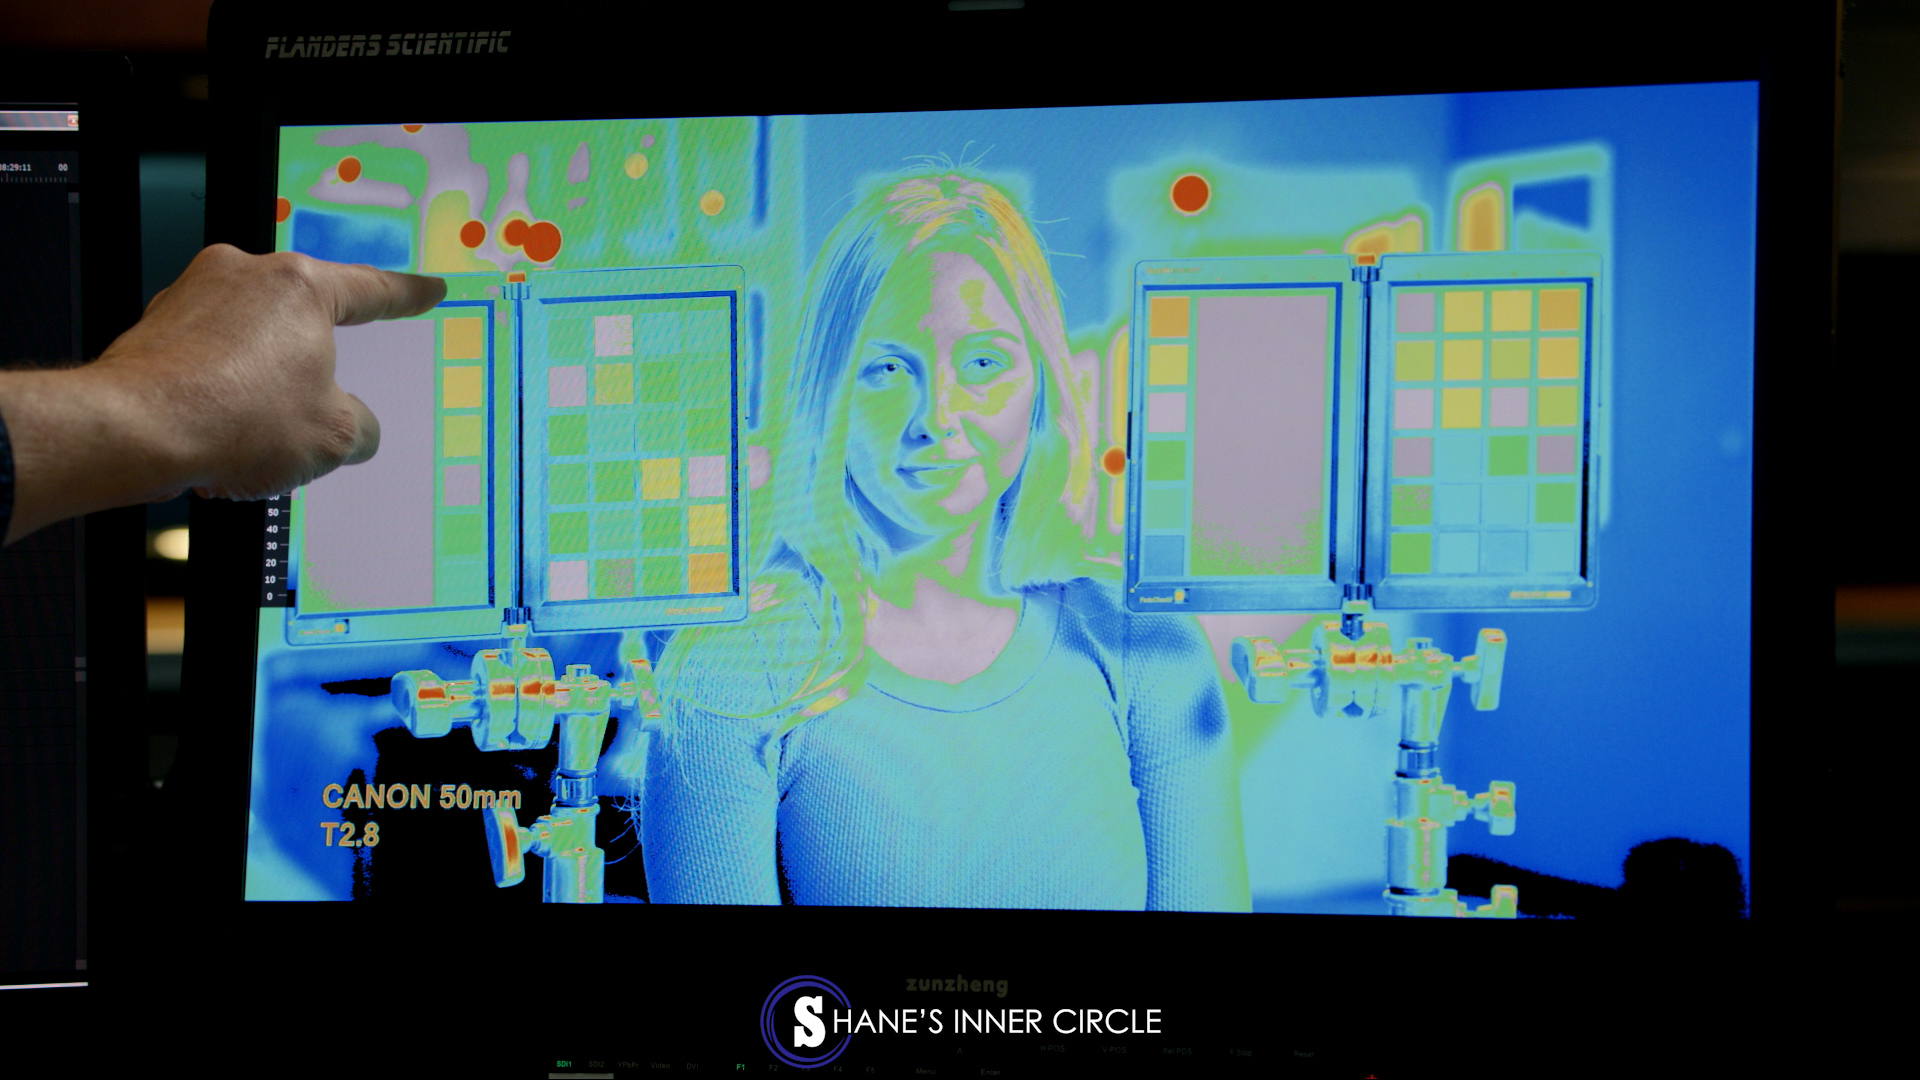
I also adjust my black levels, and I like to have my black levels at about 4%.
Black levels at 4%
Where there is black, that means there is no detail. If you look at the area I’m pointing at here, this area has no detail.
Where I’m pointing and the other black areas have no detail.
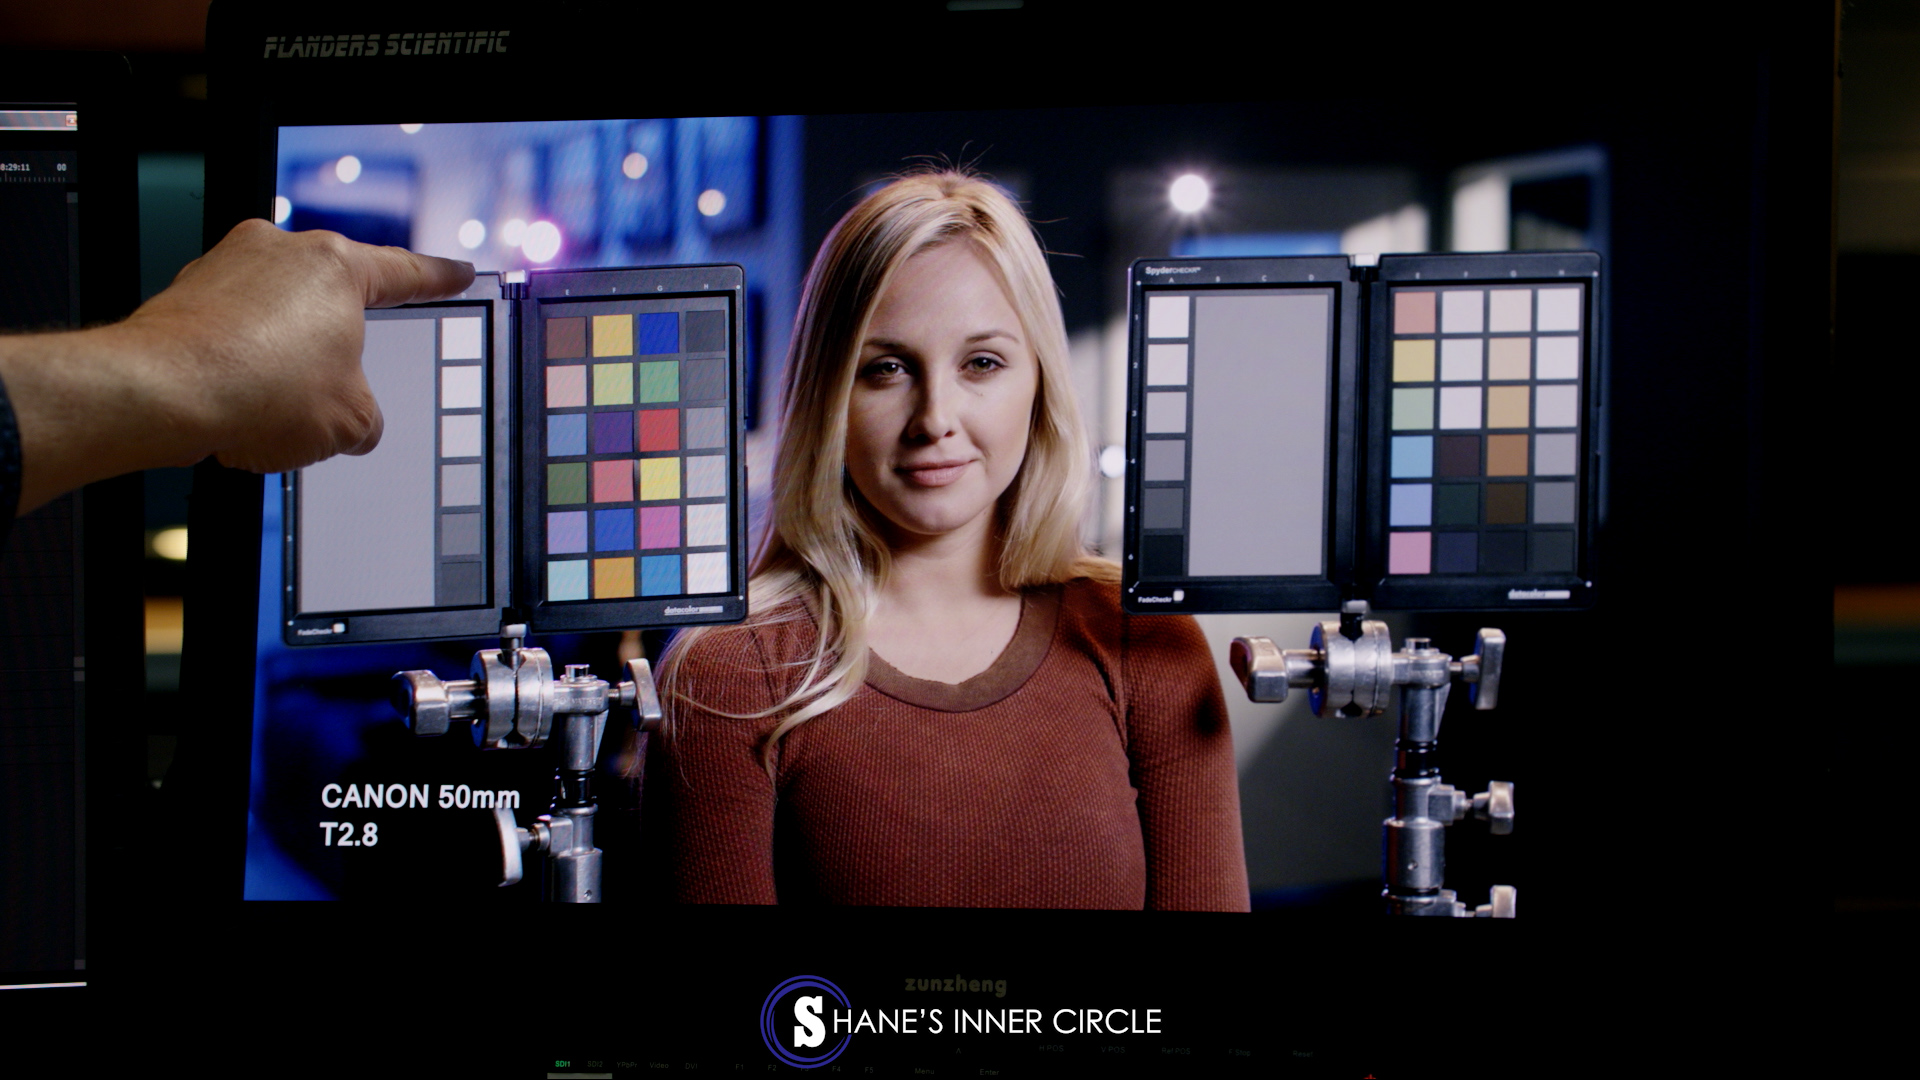
When I switch off the false color, you can see that in the same areas, there are no details:
Notice that where the red arrows are pointing, there is no detail.
Once you set your black levels, note that 100% means clipping. Then you can move your gray levels with the nobs to wherever you’d like.
Gray Levels:
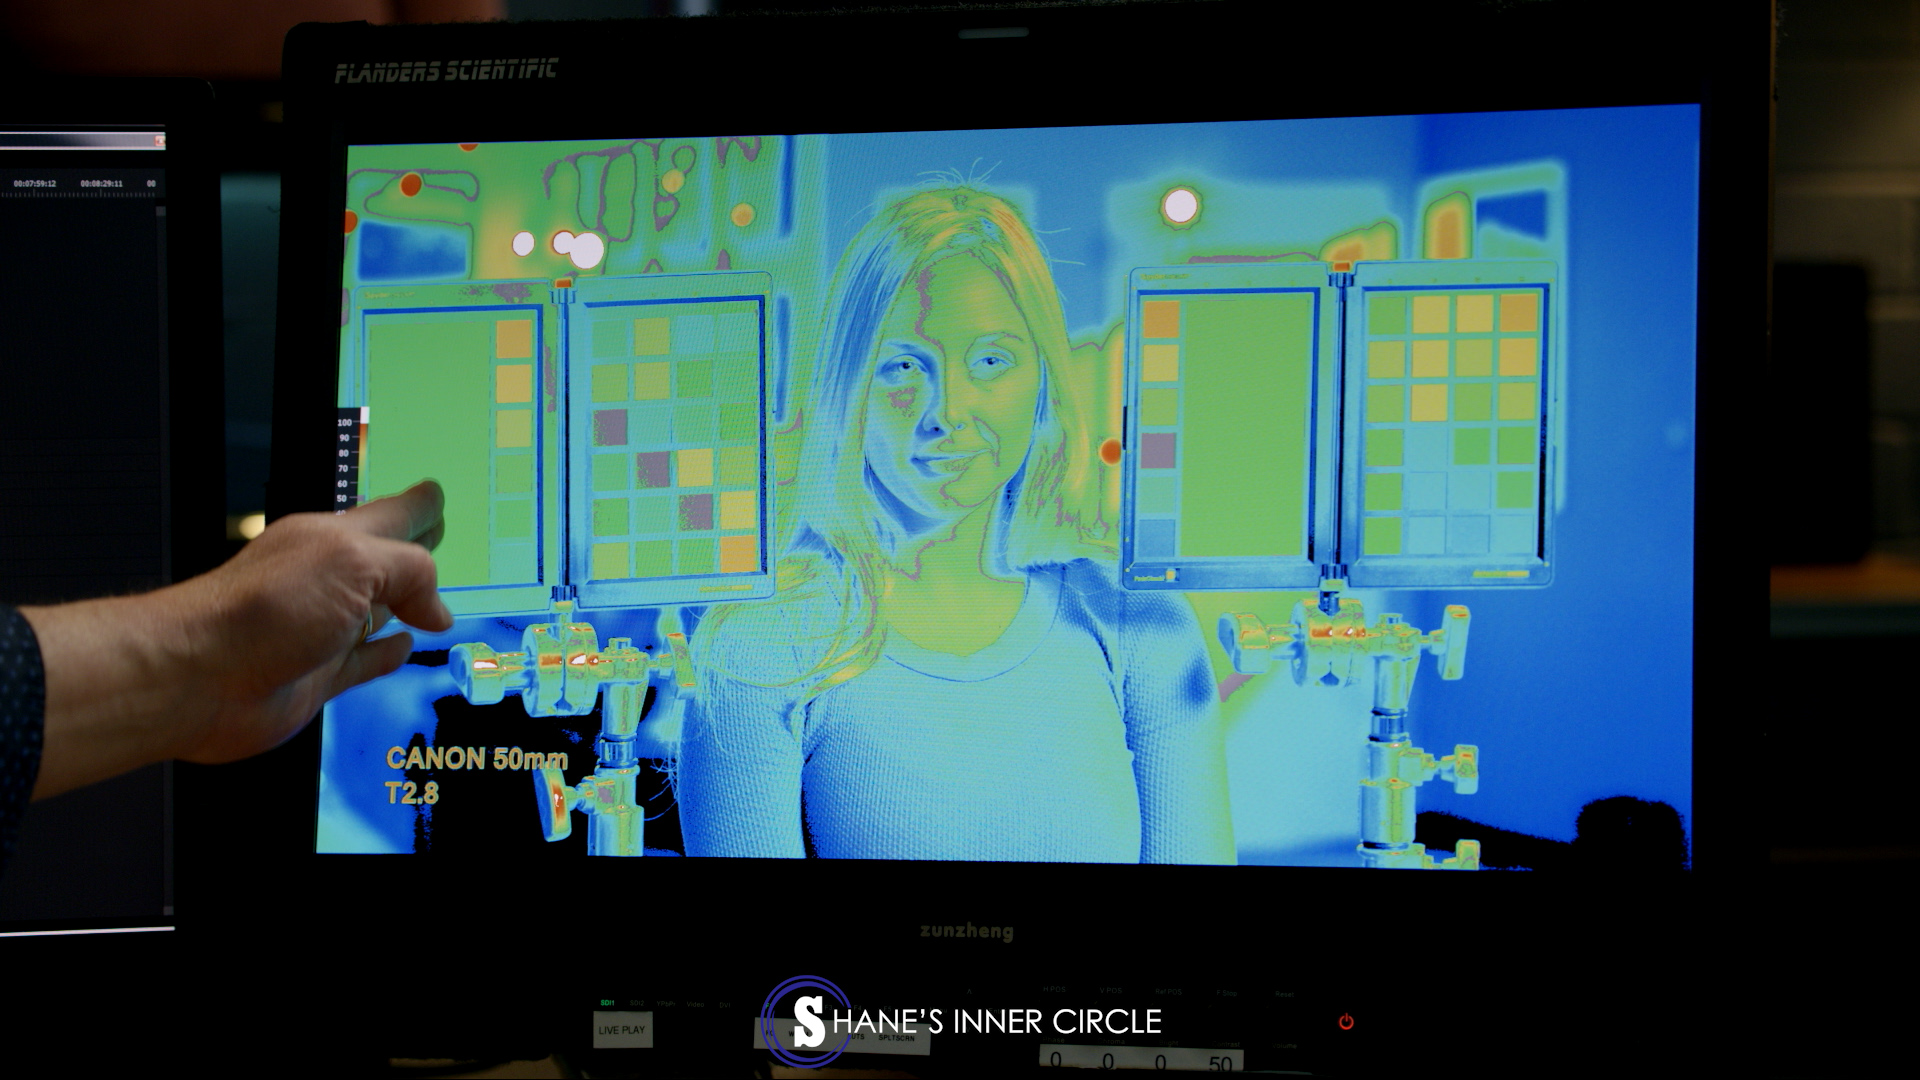
There’s a knob for your low end gray levels.
Moving the low end gray levels around with the knob
There is also a knob for adjusting your higher end gray levels.
Moving the high end gray levels
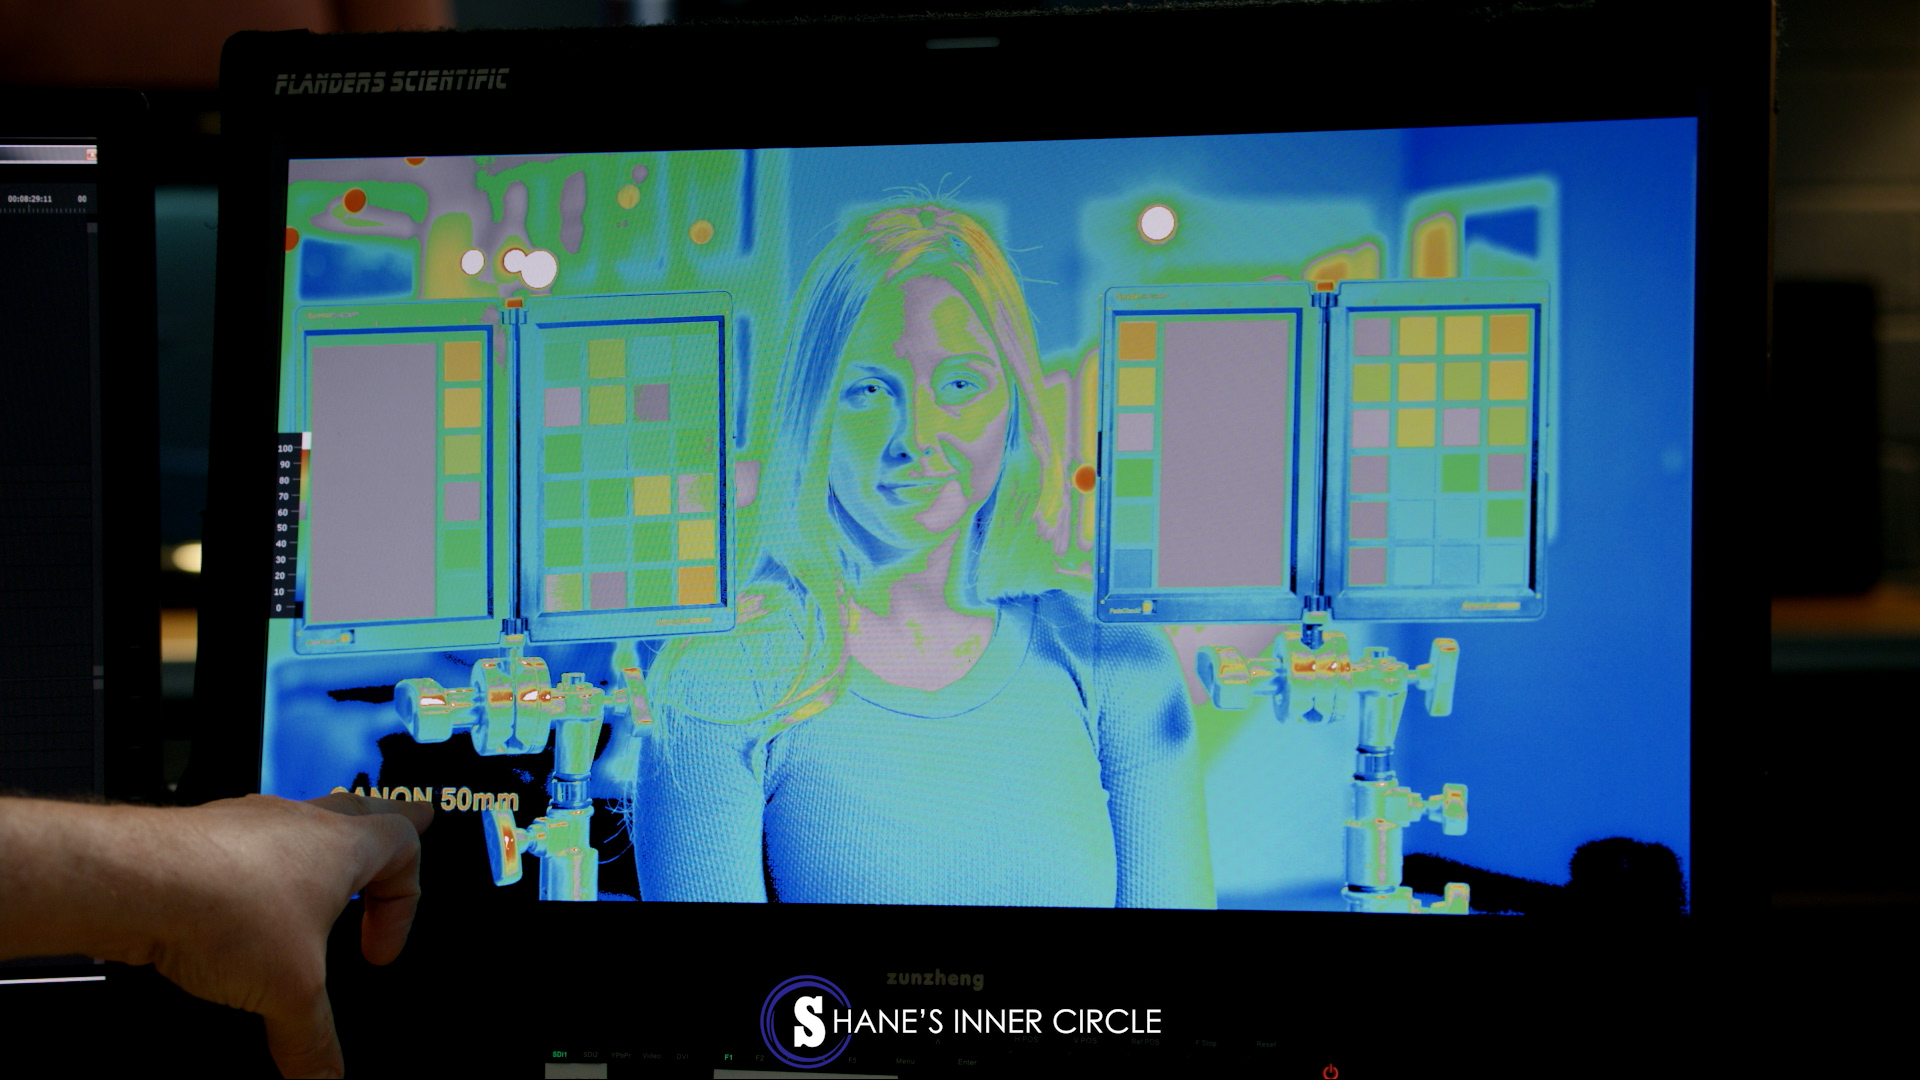
Since I like to light these kind of interview situations about a stop and a third over exposed, when I set the gray level to 50 IRE, the medium gray card on our Datacolor chart is going to be overexposed.
Notice how the medium gray card I’m pointing at is overexposed.
When I bring my gray levels to 55-65 IRE, the value where I exposed her, the medium gray card will read at that level. We also have some of that nice gray on her face.
Notice the medium gray card and parts of her face are reading where we want them at 55-65 IRE.
Gray cards are great for setting your exposure for your skin tones.
Highlights:
Now we can talk about our highlights, which is anything that is white. You can control your highlights with another knob on the monitor, and I like to set my highlights right under 100 IRE, at 98 IRE to give me a range of safety. You can see below that the lights I’m pointing at behind her are bright red, which is right below clipping on the scale, so they have just a bit of detail.
Notice the red areas are background lights, which are just below clipping.
Notice the little detail in the lights behind her.
With my eye, I know I’m going to be crushing my black levels, cranking my white levels, and have a nice medium tone. To make this all happen, the lights in the back will be clipped out, but this is ok because they’re still holding their color.
Conclusion:
Here is a summary of what I covered. First, I’m going to use the H+ knob to adjust the black levels. I like my black to be set at about 4%. Then I will adjust my B+, which is my medium gray, to about 55-65 IRE. This is the level I like for this type of interview scenario. Next, I go to my f-stop knob and I adjust my highlights, which I like to set just under 100 IRE, at 98 IRE to give myself a safety zone. False color is a powerful tool that gives you complete control over seeing your exposures and is much more detailed than waveform monitors are.
Technical Specs:


Hi Shane,
That Flanders is one nice piece of equipment.
With that in mind, I’m wondering if you can provide any tips on this kind of setup:
Right now, I’m using an Atomos Ninja 2 via HDMI for False Color. The image isn’t RAW, and will be graded only just a bit. Ultimately, I’m achieving much of the look for interviews in-camera.
Anything to keep in mind? To watch out for?
Thanks,
Joe
P.S. Thanks for all your great content, I’m new here and really appreciating your guidance.
Thanks Shane, but I still don’t see the point of dialling in the Flanders monitor.
Surely you just read of the coloured zones with the IRE scale. Doesn’t cranking the reference monitor around give you a false impression of where your exposures are?
If I understand where Mathew F. is going I think I have the same question. In the video you have gotten the correct exposure to your liking. Then you setup the monitor by adjusting the levels to visually confirm the exposure that you have already setup. Isn’t that kind of the tail wagging the dog?
Thank you so much Shane! great article/video…